Module 1 Task 2
NSX-T on AVS
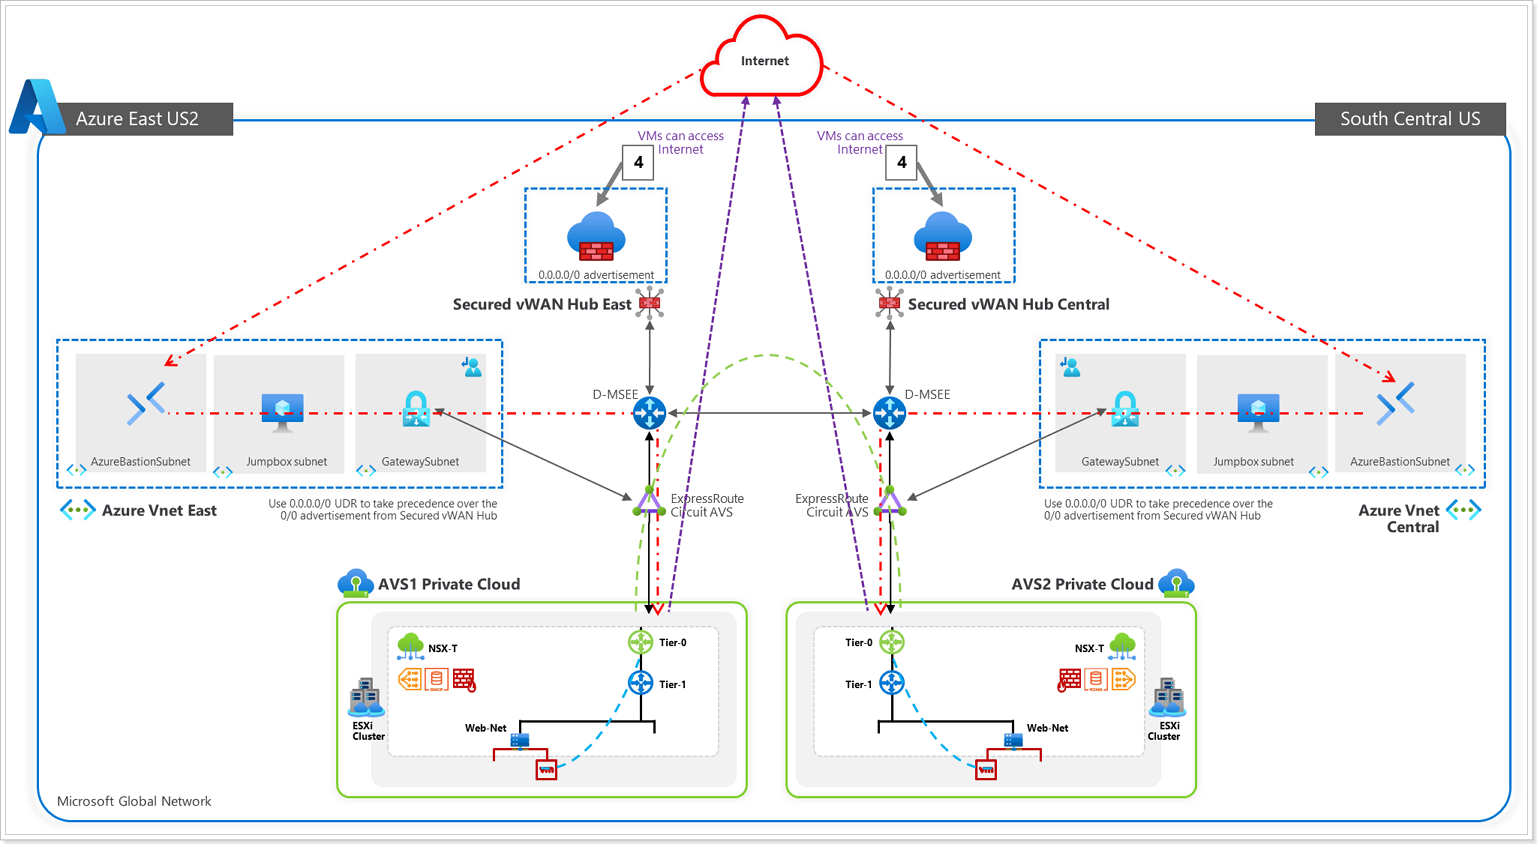
After deploying Azure VMware Solution, you can configure an NSX-T network segment from NSX-T Manager or the Azure portal. Once configured, the segments are visible in Azure VMware Solution, NSX-T Manager, and vCenter.
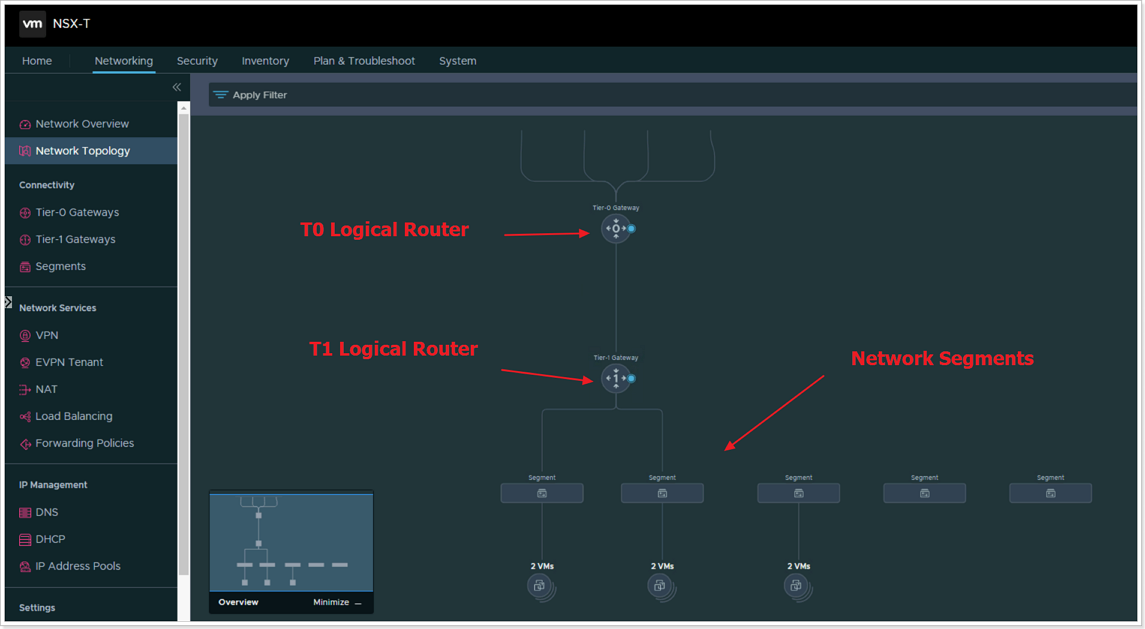
NSX-T comes pre-provisioned by default with an NSX-T Tier-0 gateway in Active/Active mode and a default NSX-T Tier-1 gateway in Active/Standby mode. These gateways let you connect the segments (logical switches) and provide East-West and North-South connectivity. Machines will not have IP addresses until statically or dynamically assigned from a DHCP server or DHCP relay.
In this Section, you will learn how to:
Create additional NSX-T Tier-1 gateways.
Add network segments using either NSX-T Manager or the Azure portal
Configure DHCP and DNS
Deploy Test VMs in the configured segments
Validate connectivity
In your Jumpbox, open a browser tab and navigate to the NSX-T URL found in the AVS Private Cloud blade in the Azure Portal. Login using the appropriate credentials noted in the Identity tab.
Exercise 1: Configure DNS Forwarder
NOTE: This task is done by default for every new AVS deployment
AVS DNS forwarding services run in DNS zones and enable workload VMs in the zone to resolve fully qualified domain names to IP addresses. Your SDDC includes default DNS zones for the Management Gateway and Compute Gateway. Each zone includes a preconfigured DNS service. Use the DNS Services tab on the DNS Services page to view or update properties of DNS services for the default zones. To create additional DNS zones or configure additional properties of DNS services in any zone, use the DNS Zones tab.
The DNS Forwarder and DNS Zone are already configured for this training but follow the steps to see how to configure it for new environments.
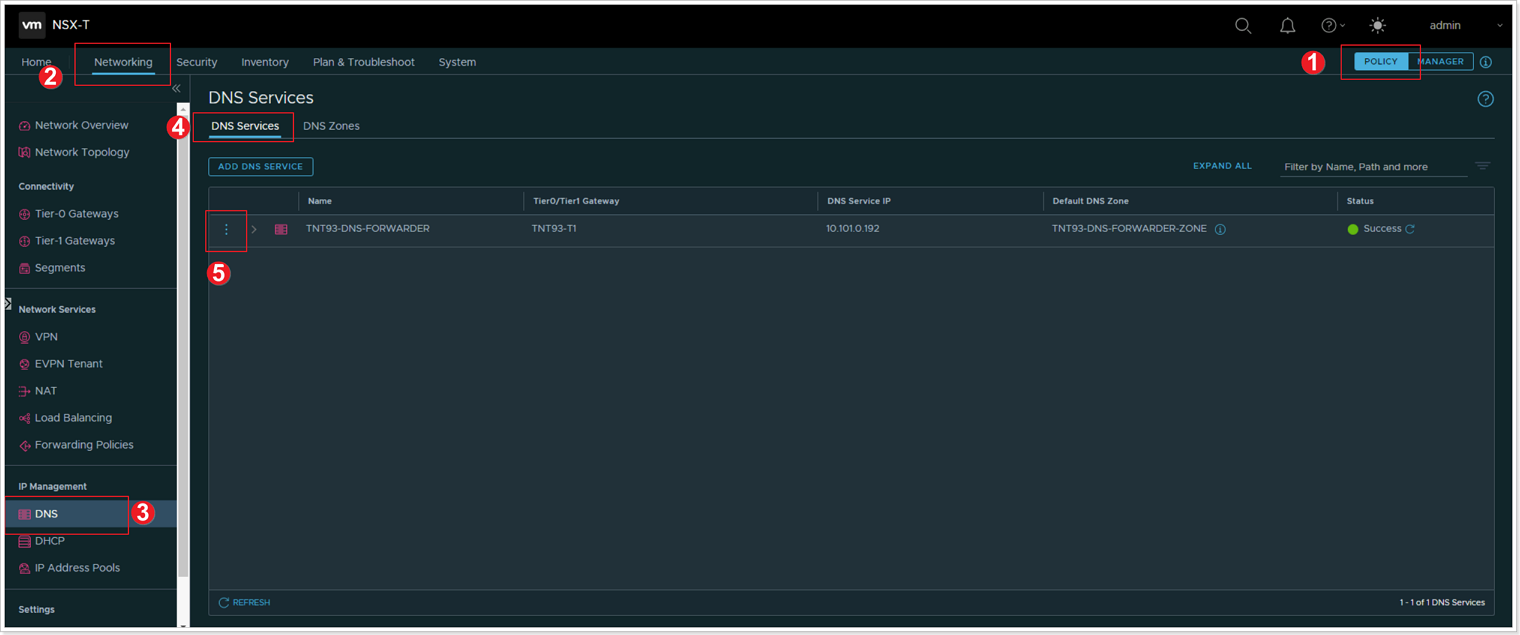
- Ensure the POLICY view is selected.
- Click Networking.
- Click DNS.
- Click DNS Services.
- Click the elipsis button -> Edit to view/edit the default DNS settings.
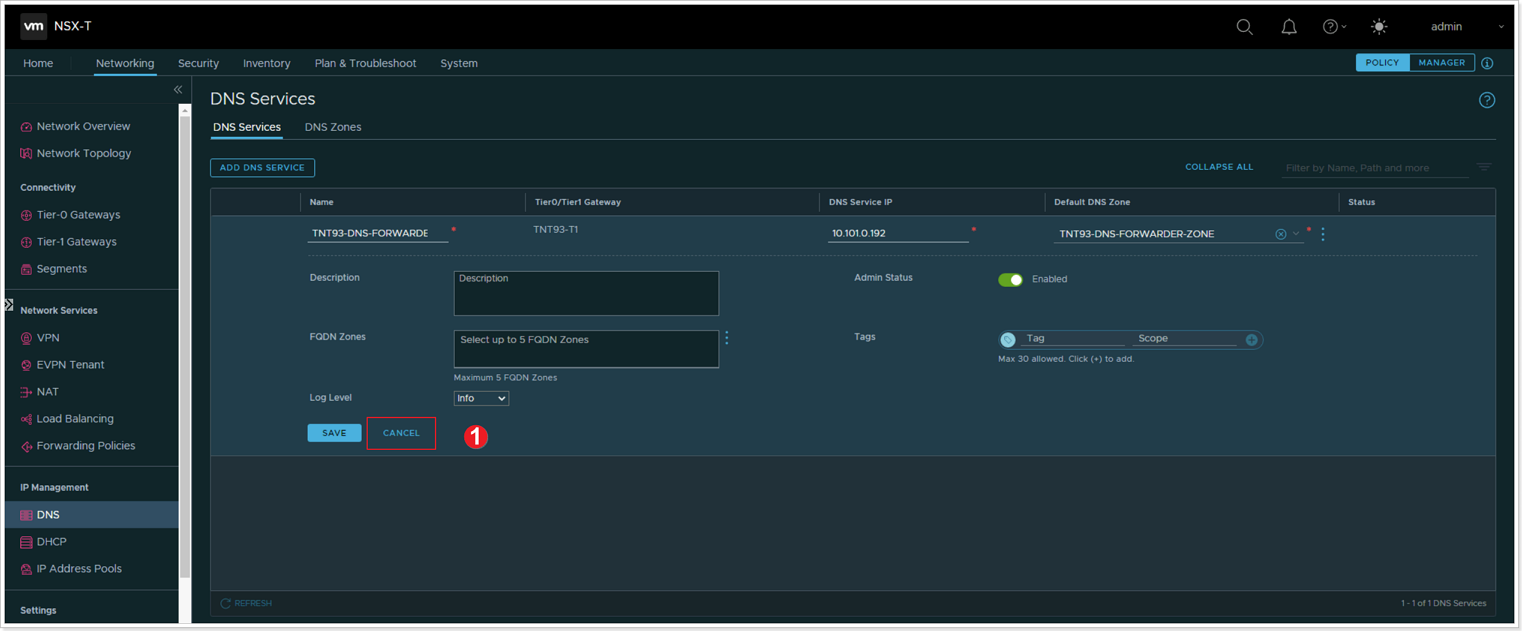
- Examine the settings (do not change anything) and click CANCEL.
Exercise 2: Add DHCP Profile in AVS Private Cloud
Please ensure to replace X with your group’s assigned number, Y with your participant number. For participant 10 please replace XY with 20
| AVS NSX-T Details | |
|---|---|
| DHCP Server IP | 10.XY.50.1/30 |
| Segment Name | WEB-NET-GROUP-XY |
| Segment Gateway | 10.XY.51.1/24 |
| DHCP Range | 10.XY.51.4-10.XY.51.254 |
A DHCP profile specifies a DHCP server type and configuration. You can use the default profile or create others as needed.
A DHCP profile can be used to configure DHCP servers or DHCP relay servers anywhere in your SDDC network.
Step 1: Add DHCP Profile
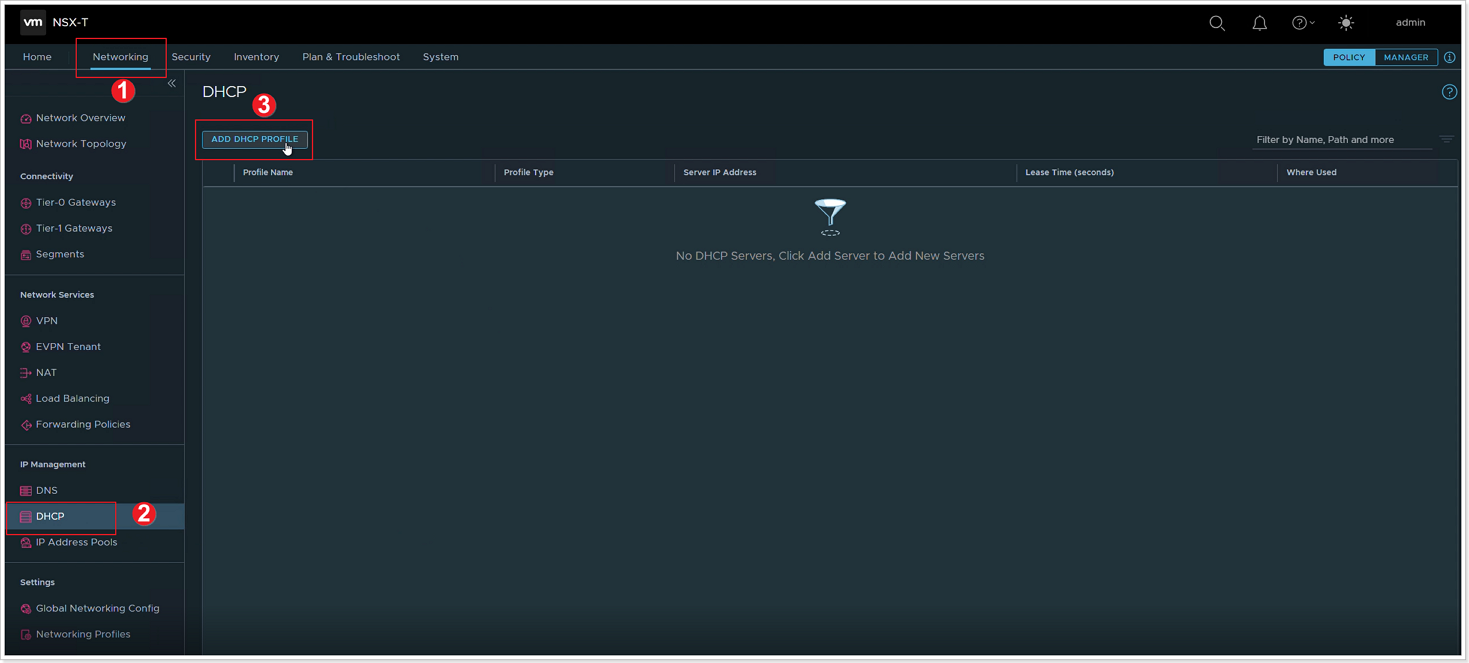
- In the NSX-T Console, click Networking.
- Click DHCP.
- Click ADD DHCP PROFILE.
Step 2: Configure DHCP Profile

- Name the profile as DHCP-Profile-GROUP-XY-AVS for your respective group/participant.
- Ensure DHCP Server is selected.
- Specify the IPv4 Server IP Address as 10.XY.50.1/30 and optionally change the Lease Time or leave the default.
- Click SAVE.
Exercise 3: Create an NSX-T T1 Logical Router
NSX-T has the concept of Logical Routers (LR). These Logical Routers can perform both distributed or centralized functions. In AVS, NSX-T is deployed and configured with a default T0 Logical Router and a default T1 Logical Router. The T0 LR in AVS cannot be manipulated by AVS customers, however the T1 LR can be configured however an AVS customer chooses. AVS customers also have the option to add additional T1 LRs as they see fit.
Step 1: Add Tier-1 Gateway
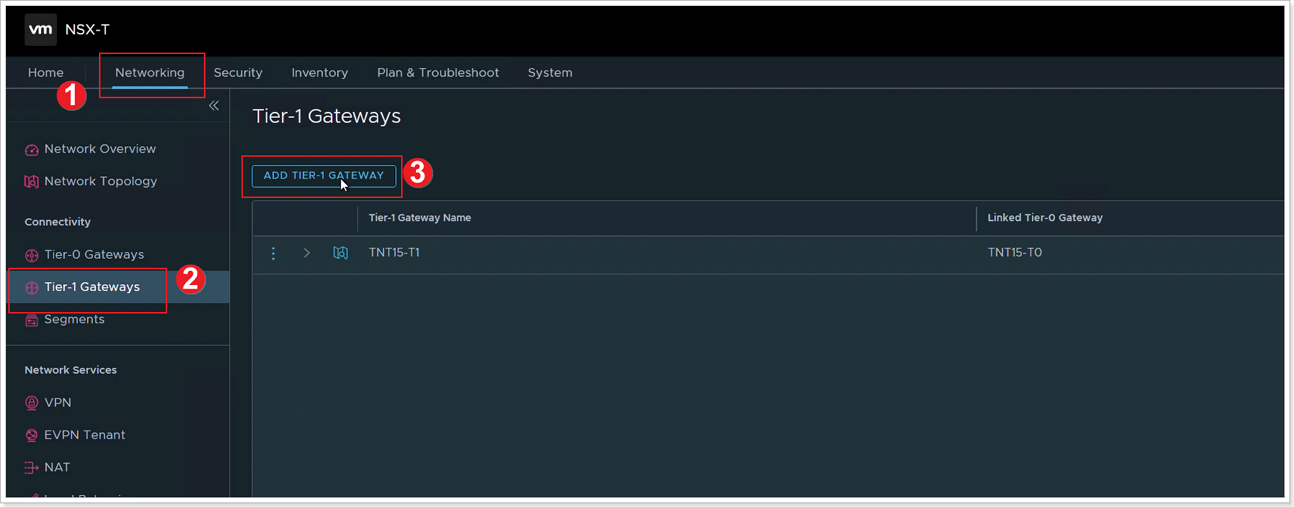
- Click Networking.
- Click Tier-1 Gateways.
- Click ADD TIER-1 GATEWAY.
Step 2: Configure Tier-1 Gateway
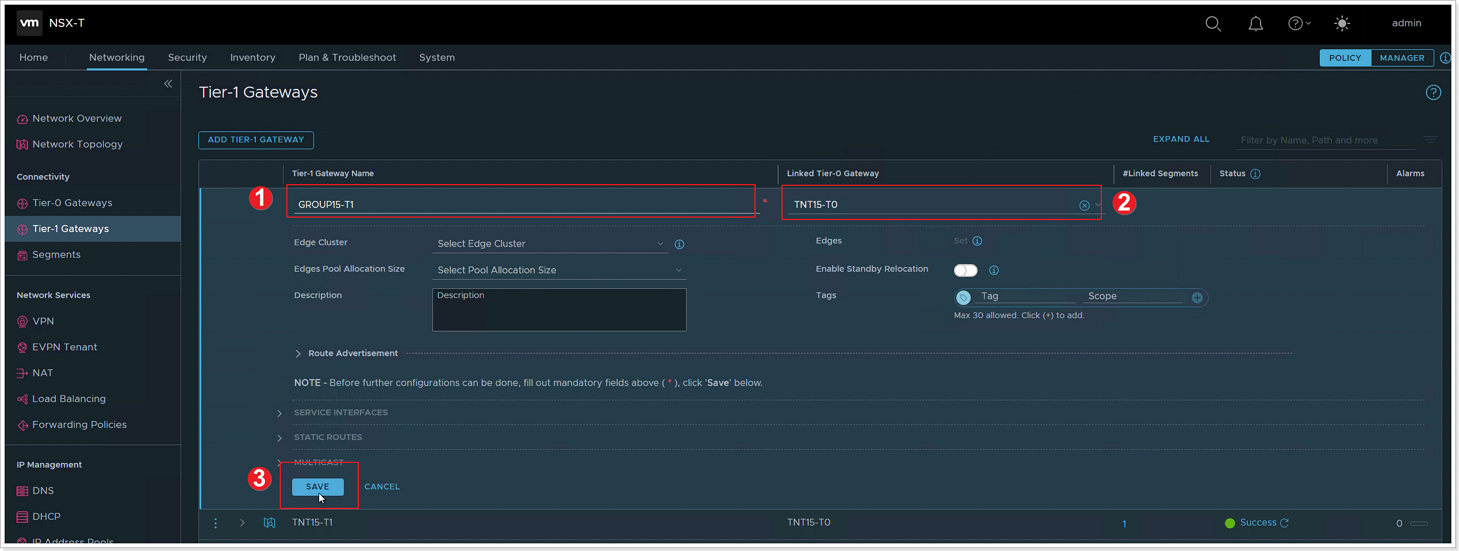
- Give your T1 Gateway a Name. Use GROUP-XY-T1.
- Select the default T0 Gateway, usually TNT**-T0.
- Click SAVE. Clck NO to the question “Want to continue configuring this Tier-1 Gateway?”.
Exercise 4: Add the DHCP Profile to the T1 Gateway
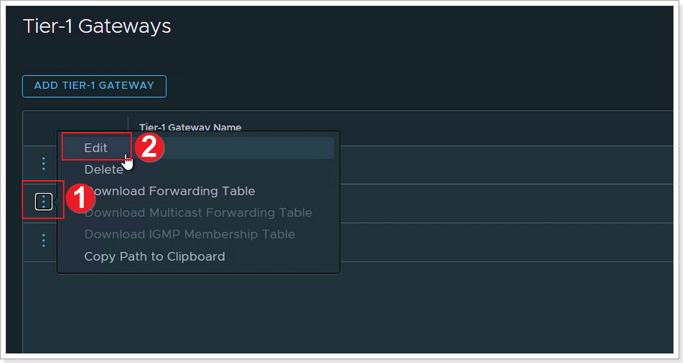
- Click the elipsis next to your newly created T1 Gateway.
- Click Edit.
Step 1: Set DHCP Configuration to Tier-1 Gateway
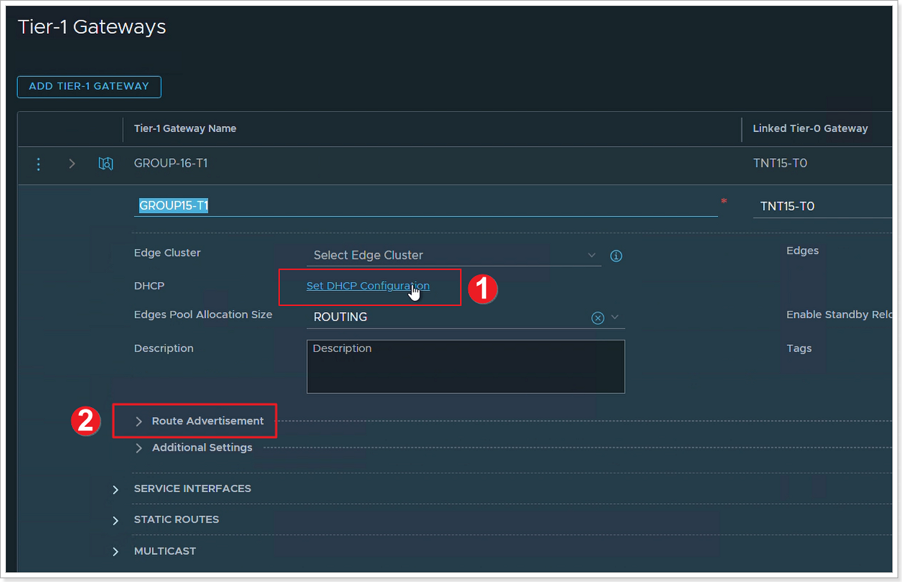
- Click Set DHCP Configuration.
- After finishing the DHCP Configuration, click to expand Route Advertisement and make sure all the buttons are enabled.
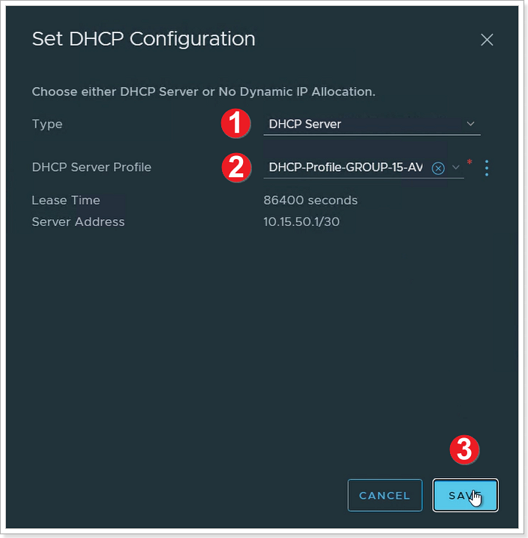
- Ensure DHCP Server is selected for Type.
- Select the DHCP Server Profile you previously created.
- Click SAVE. Click SAVE again to confirm changes, then click CLOSE EDITING.
Exercise 5: Create Network Segment for AVS VM workloads
Network segments are logical networks for use by workload VMs in the SDDC compute network. Azure VMware Solution supports three types of network segments: routed, extended, and disconnected.
A routed network segment (the default type) has connectivity to other logical networks in the SDDC and, through the SDDC firewall, to external networks.
An extended network segment extends an existing L2VPN tunnel, providing a single IP address space that spans the SDDC and an On-Premises network.
A disconnected network segment has no uplink and provides an isolated network accessible only to VMs connected to it. Disconnected segments are created when needed by HCX. You can also create them yourself and can convert them to other segment types.
Step 1: Add Network Segment
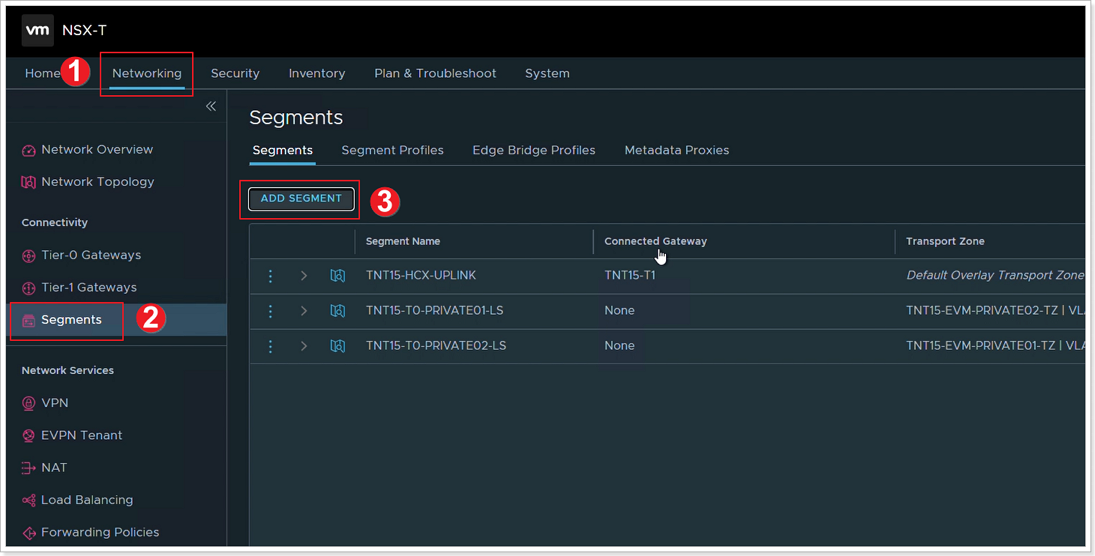
- Click Networking.
- Click Segments.
- Click ADD SEGMENT.
Step 2: Configure Network Segment
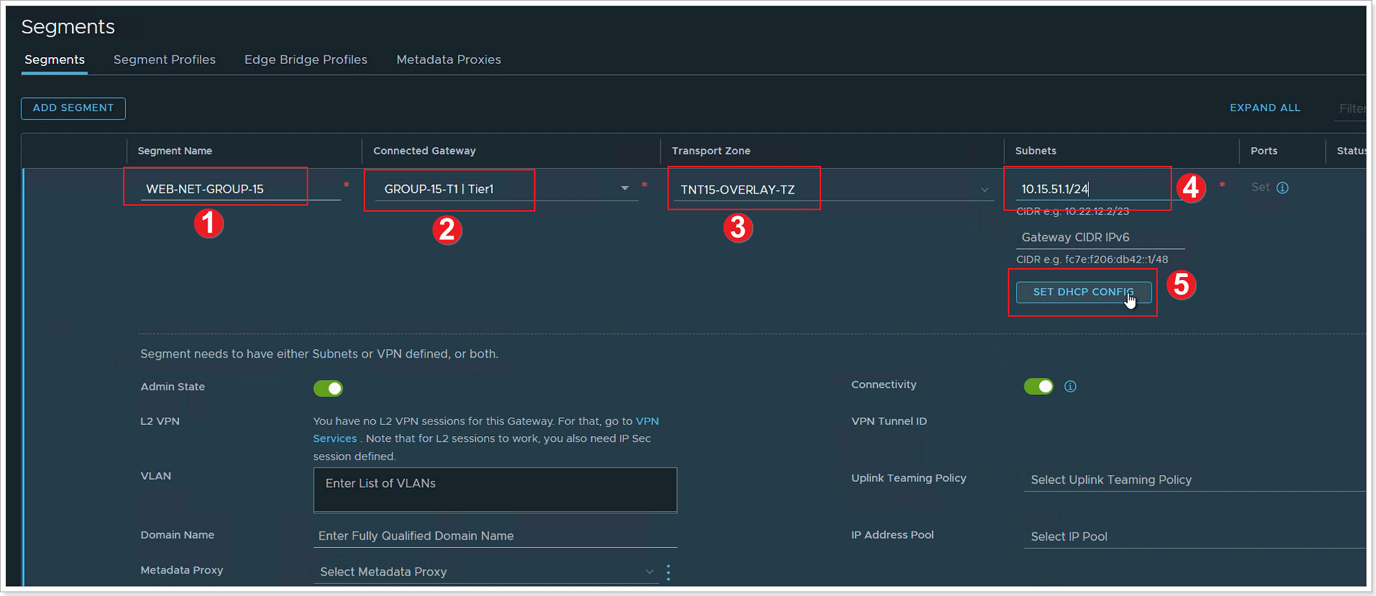
- Enter WEB-NET-GROUP-XY in the Segment Name field.
- Select the Tier-1 Gateway you created previously (GROUP-XY-T1) as the Connected Gateway.
- Select the pre-configured overlay Transport Zone (TNTxx-OVERLAY-TZ).
- In the Subnets column, you will enter the IP Address for the Gateway of the Subnet that you are creating, which is the first valid IP of the Address Space.
- For Example: 10.XY.51.1/24
- Then click SET DHCP CONFIG.
Step 3: Set DHCP Configuration on Network Segment

- Ensure Gateway DHCP Server is selected for DHCP Type.
- In the DHCP Config click the toggle button to Enabled.
- Then in the DHCP Ranges field enter the range according to the IPs assigned to your group. The IP in in the same network as the Gateway defined above.
- Use 10.XY.51.4-10.XY.51.254
- In the DNS Servers, enter the IP 1.1.1.1.
- Click Apply. Then SAVE and finally NO.
Important The IP address needs to be on a non-overlapping RFC1918 address block, which ensures connection to the VMs on the new segment.
References
Feedback
Was this page helpful?
Glad to hear it! Please tell us how we can improve.
Sorry to hear that. Please tell us how we can improve.