Module 1 Task 3
Create Test VMs
Now that we have our networks created, we can deploy virtual machines and ensure we can get an IP address from DHCP. Go ahead and Login into your AVS vCenter.
Exercise 1: Create a content Library
Step 1: Create vCenter Content Library

- From AVS vCenter, click the Menu bars.
- Click Content Libraries.
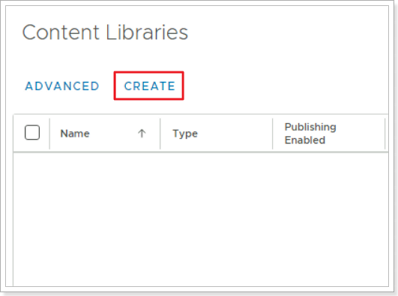
Click CREATE
Step 2: Give your Content Library a Name and Location
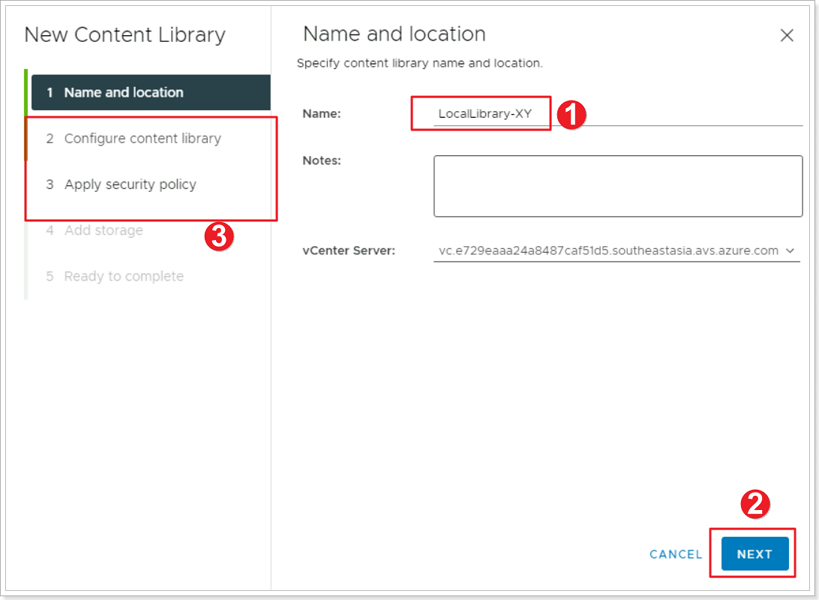
- Name your Library LocalLibrary-XY where X is your group number and Y is your participant number
- Click NEXT
- Leave the defaults for Configure content library and for Appy security policy
Step 3: Specify Datastore for Content Library
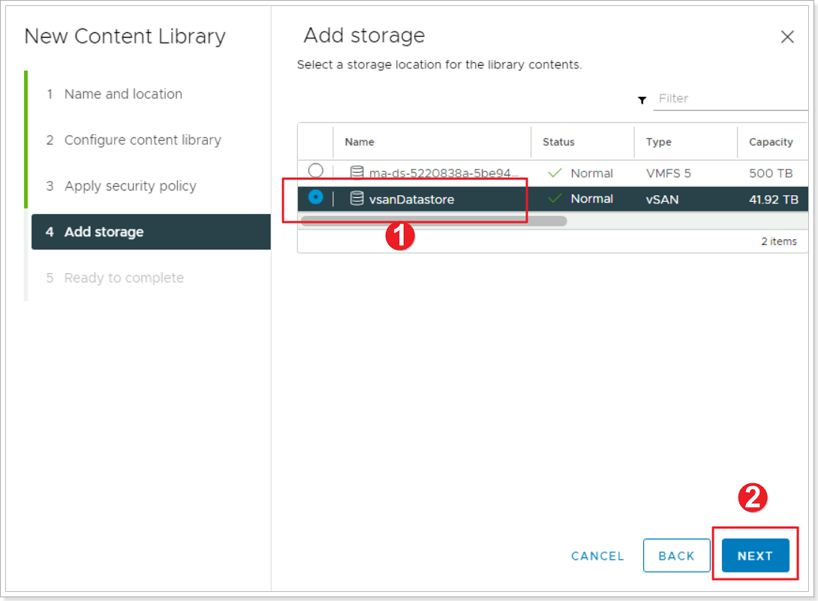
- For Add storage select thevsanDatastore
- Click NEXT then FINISH
Exercise 2: Import Item to Content Library
Step 1: Import OVF/OVA to Content Library
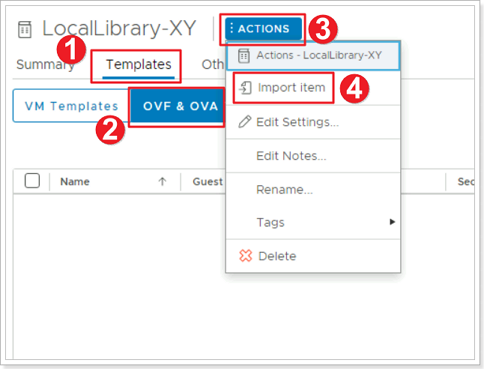
- Click on your newly created Library and click Templates.
- Click OVF & OVA Templates
- Click ACTIONS
- Click Import item
Step 2: Specify URL for OVF/OVA
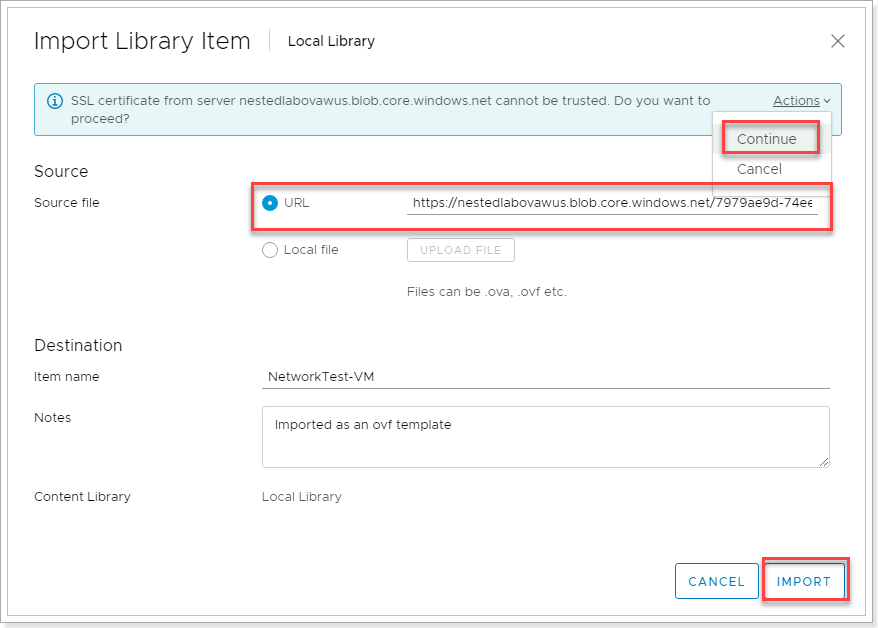
Import using this URL - Download Link
https://gpsusstorage.blob.core.windows.net/ovas-isos/workshop-vm.ova
This will now download and import the VM to the library
Exercise 3: Create VMs
Step 1: Create VM from Template
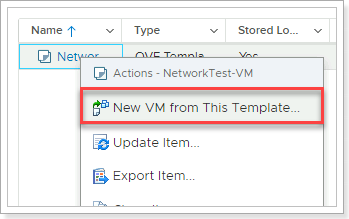
Once downloaded, Right-click the VM Template > New VM from This Template.
Step 2: Select a Name and Folder for the VM

- Give the VM a name – e.g VM1-AVS-XY
- Select the SDDC-Datacenter
- Click NEXT
Step 3: Select a Compute Resource
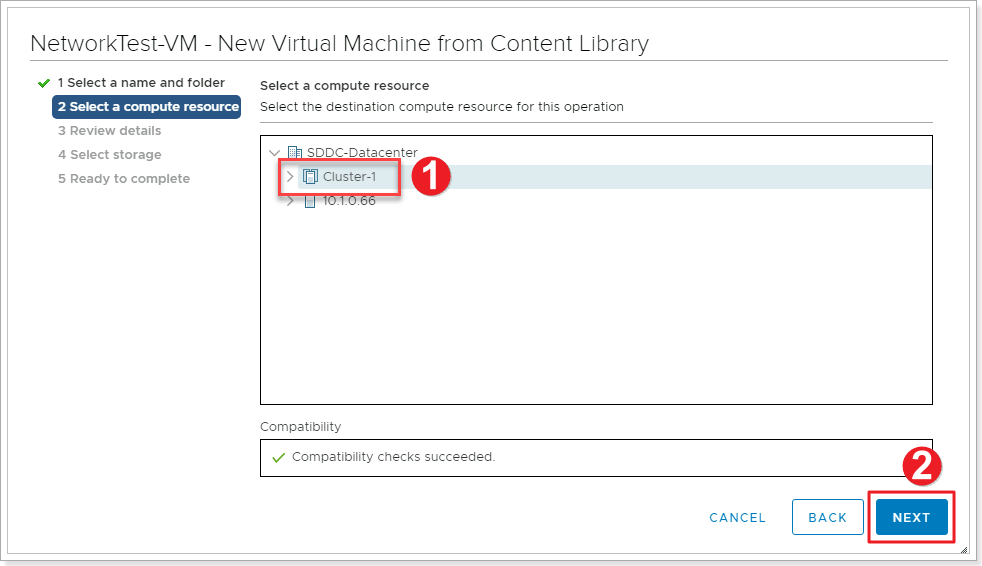
- Select Cluster-1
- Click NEXT
Step 4: Review Details, select Datastore
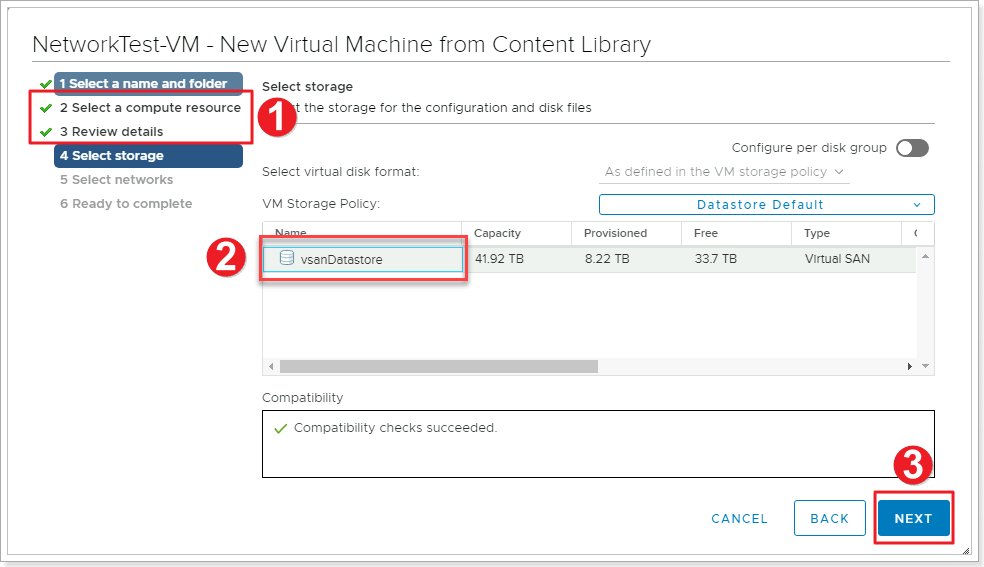
- Review Details and click NEXT. Accept the terms and click NEXT
- Confirm the storage as the vsanDatastore
- Click NEXT
Step 5: Select network for VM
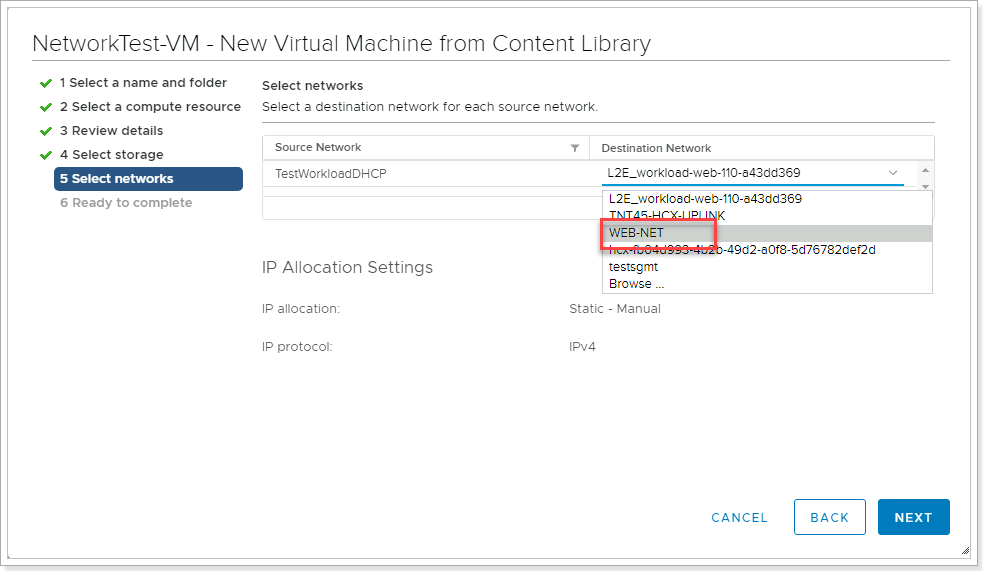
Select the segment that you created previously- “WEB-NET-GROUP-XY” and click NEXT. Then review and click FINISH.
Once deployed, head back to VM’s and Templates and Power On this newly created VM. This VM is provided as a very lightweight Linux machine that will automatically pick up DHCP if configured. Since we have added this to the WEB-NET-GROUP-XY segment, it should get an IP address from this DHCP range. This usually takes few seconds. Click the “Refresh” button on vCenter toolbar.
If you see an IP address here, we have successfully configured the VM and it has connected to the segment and will be accessible from the Jumpbox.
We can confirm this by SSH’ing to this IP address from the Jumpbox.
Username: root
Password: AVSR0cks!
YOU MAY BE ASKED TO CHANGE THE PASSWORD OF THE ROOT USER ON THE VM, CHANGE IT TO A PASSWORD OF YOUR CHOOSING, JUST REMEMBER WHAT THAT PASSWORD IS.
Once you SSH into the VMs, enter these 2 commands to enable ICMP traffic on the VM:
iptables -A OUTPUT -p icmp -j ACCEPT
iptables -A INPUT -p icmp -j ACCEPT
PLEASE REPEAT THESE STEPS AND CREATE A SECOND VM CALLED ‘VM2-AVS-XY’
Feedback
Was this page helpful?
Glad to hear it! Please tell us how we can improve.
Sorry to hear that. Please tell us how we can improve.