Module 2 Task 10
Task 10: Create compute profiles
You will perform the instructions below from the On-premises VMware Environment
HCX Compute Profile
A compute profile contains the compute, storage, and network settings that HCX uses on this site to deploy the interconnected dedicated virtual appliances when service mesh is added. For more information on compute profile and its creation please refer to VMware documentation.
Step 1: Compute Profile Creation
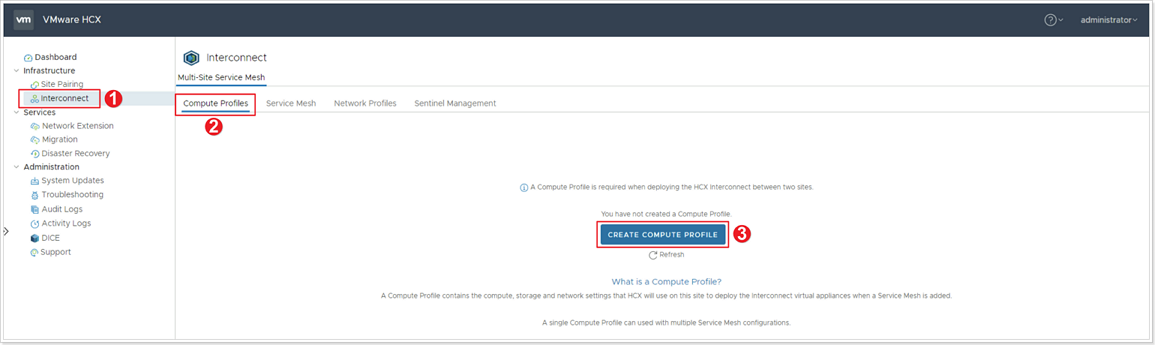
- In your on-premises HCX installation, click Interconnect.
- Click Compute Profiles.
- Click CREATE COMPUTE PROFILE.
Step 2: Name Compute Profile
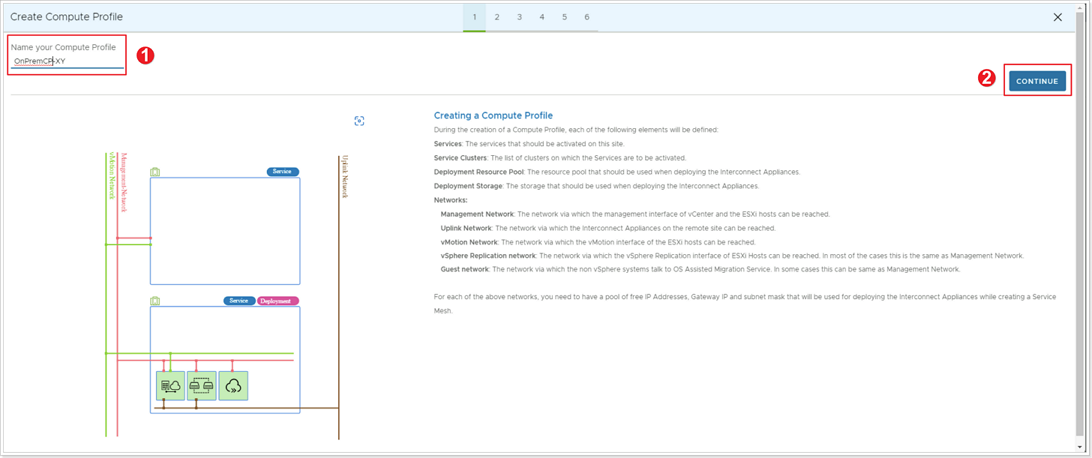
- Give your Compute Profile a Name. Suggestion: OnPrem-CP-X-Y, where X is your group number and Y is your participant number.
- Click CONTINUE.
Step 3: Select Services for Compute Profile
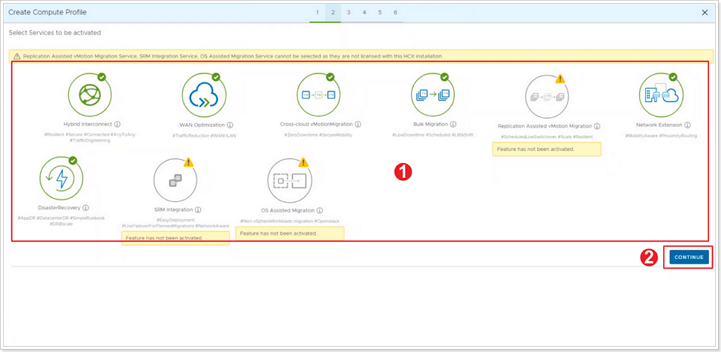
- Review the selected services. By default all the above services are selected. In a real world scenario, if a customer let’s say doesn’t need Network Extension, you would unselect that service here. Leave all defaults for the purpose of this workshop.
- Click CONTINUE.
Step 4: Select Service Resources
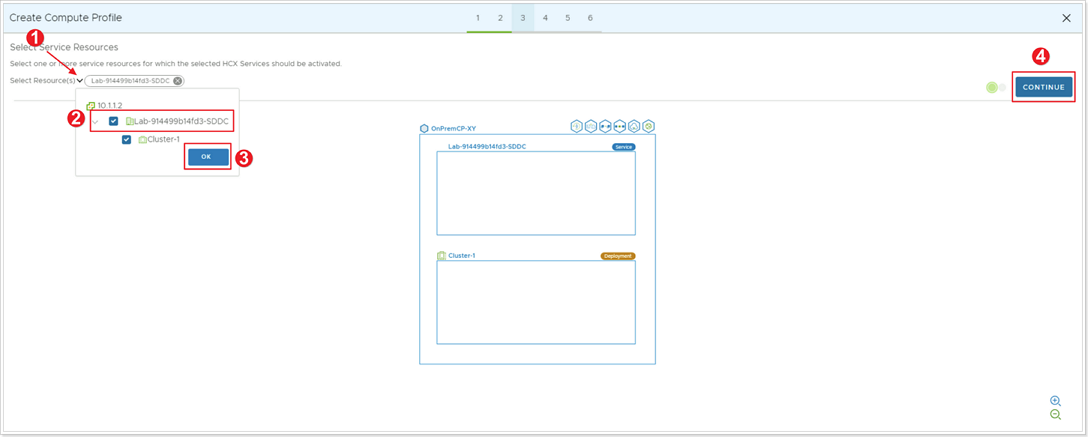
- Click the arrow next to Select Resource(s).
- In this on-premises simulation, you only have one Cluster called OnPrem-SDDC-Datacenter-X-Y. In a real world scenario, it’s likely your customer may have more than one Cluster. HCX Service Resources are resources from where you’d like HCX to either migrate or protect VMs from. Select the top level OnPrem-SDDC-Datacenter-X-Y.
- Click OK.
- Click CONTINUE.
Step 5: Select Deployment Resources

- Click the arrow next to Select Resource(s). Here you will be selecting the Deployment Resource, which is where the additional HCX appliances needing to be installed will be placed in the on-premises environment. Select OnPrem-SDDC-Cluster-X-Y.
- For Select Datastore click and select the LabDatastore that exists in your simulated on-premises environment. This will be the on-premises Datastore the additional HCX appliances will be placed in.
- (Optional) click to Select Folder in the on-premises vCenter Server where to place the HCX appliances. You can select vm for example.
- Interconnect Appliance Reservation Settings, here you would set CPU/Memory Reservations for these appliances in your on-premises vCenter Server.
- Leave the default 0% value.
- Click CONTINUE.
Step 6: Select Management Network Profile
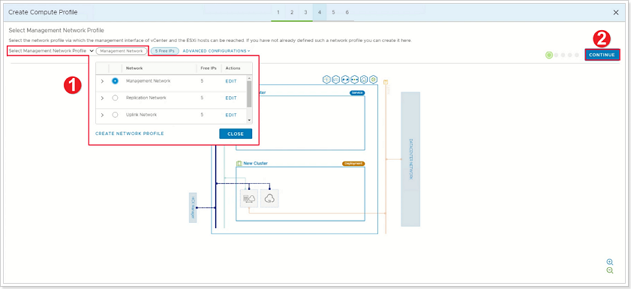
- Select the Management Network Profile you created in a previous step.
- Click CONTINUE.
Step 7: Select Uplink Network Profile
Warning
Due to the current lab setup, please select network OnPrem-management-x-y. However, in typical production scenarios it is more likely to be the Uplink Network Profile.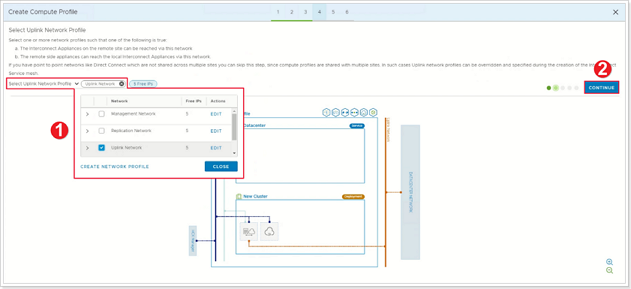
- Select the Management Network Profile you created in a previous step. DO NOT select the uplink network profile, this network profile was created to simulate what an on-premises environment might look like, but the only functional uplink network for this lab is the Management Network.
- Click CONTINUE.
Step 8: Select vMotion Network Profile
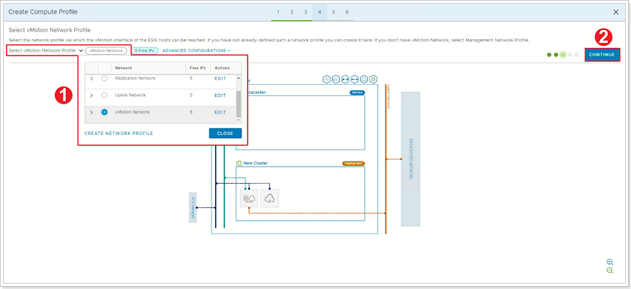
- Select the vMotion Network Profile you created in a previous step.
- Click CONTINUE.
Step 9: Select vSphere Replication Network Profile
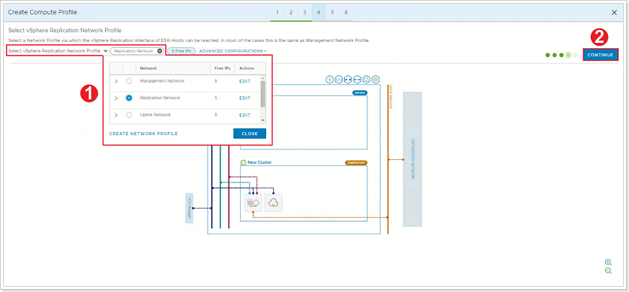
- Select the vSphere Replication Network Profile you created in a previous step.
- Click CONTINUE.
Step 10: Select Network Containers
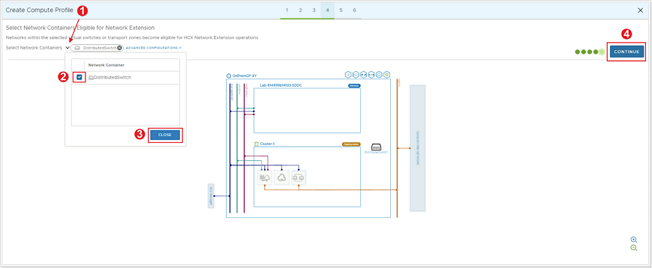
- Click the arrow next to Select Network Containers.
- Select the virtual distributed switch you’d like to make eligible for Network Extension.
- Click CLOSE.
- Click CONTINUE.
Step 11: Review Connection Rules
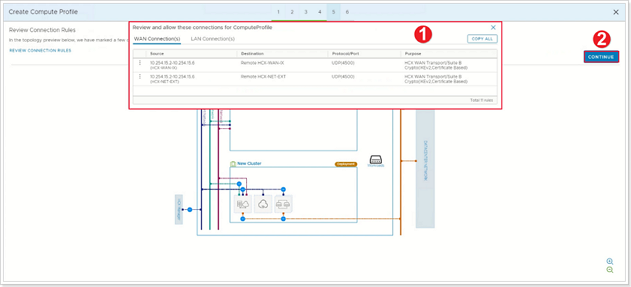
- Review the connection rules.
- Click CONTINUE.
Step 12: Finish creation of Compute Profile
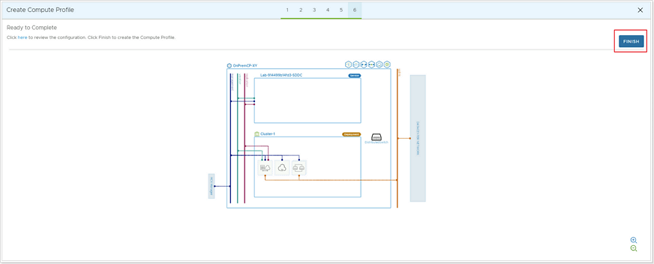
Click FINISH to create the compute profile.
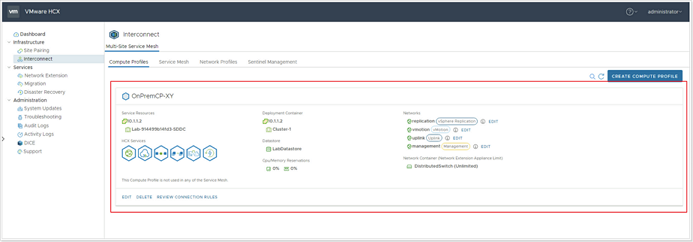
Your Compute Profile is created successfully.
Feedback
Was this page helpful?
Glad to hear it! Please tell us how we can improve.
Sorry to hear that. Please tell us how we can improve.
Last modified December 17, 2024: update workflow (8881230)