Module 2 Task 11
HCX Service Mesh Creation
An HCX Service Mesh is the effective HCX services configuration for a source and destination site. A Service Mesh can be added to a connected Site Pair that has a valid Compute Profile create on both of the sites.
Adding a Service Mesh initiates the deployment of HCX Interconnect virtual appliances on both sites. An interconnect Service Mesh is always created at the source site.
More information can be found inf VMware’s Official Documentation, Creating a Service Mesh.
Step 1: Create Service Mesh
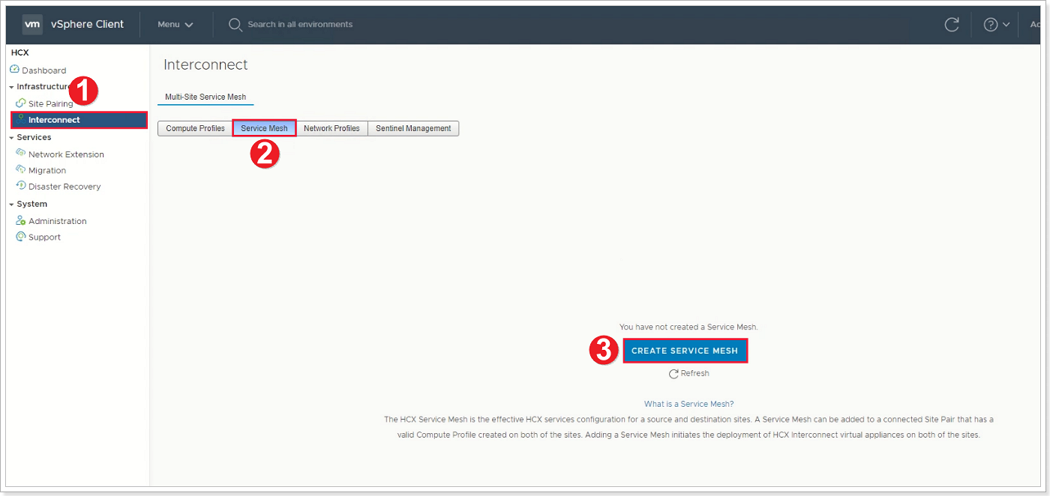
- Click Interconnect.
- Click Service Mesh.
- Click CREATE SERVICE MESH.
Step 2: Select Sites

- Select the source site (on-premises).
- Select the destination site (AVS).
- Click CONTINUE.
Step 3: Select Compute Profiles
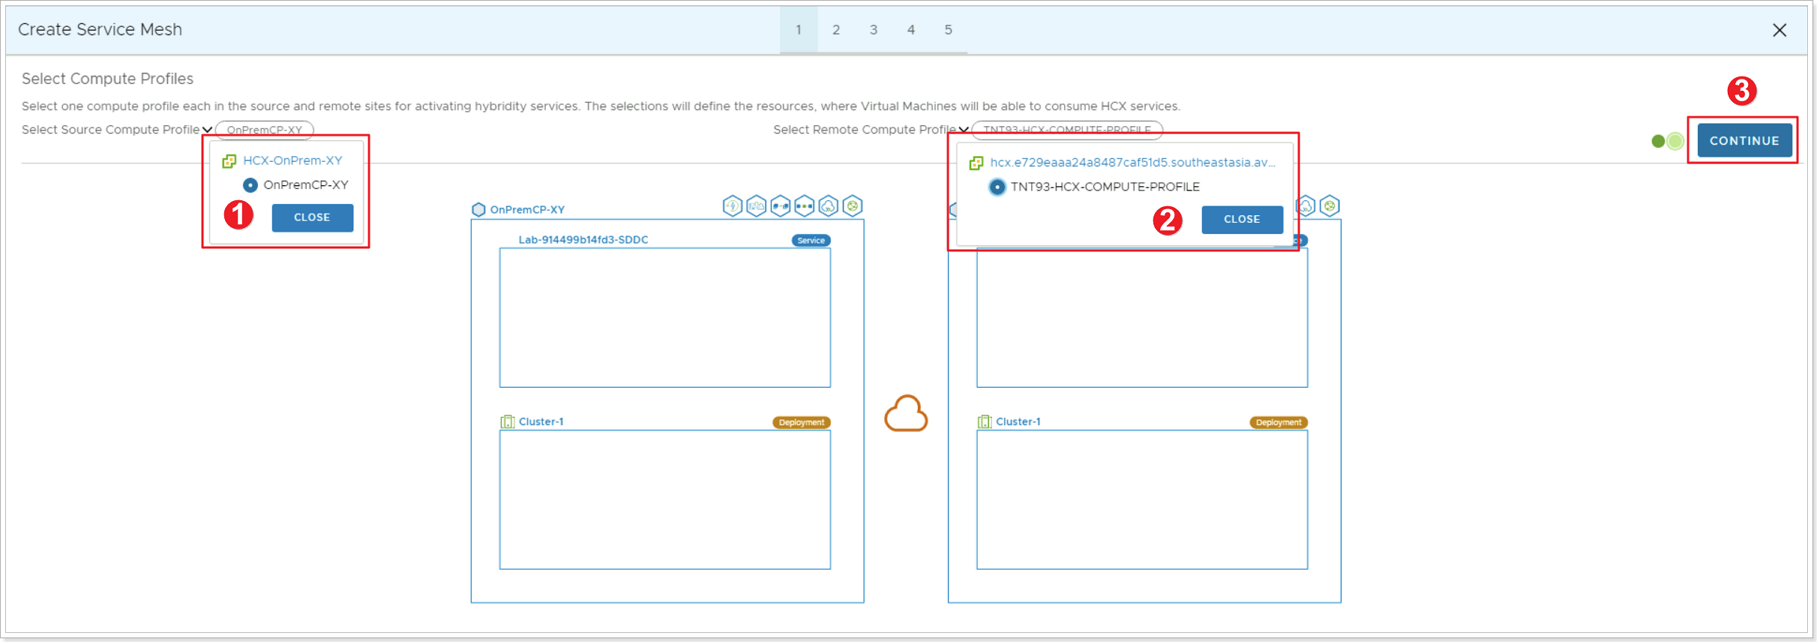
- Click to select Source Compute Profile which you recently created, click CLOSE.
- Click to select Remote Compute Profile from AVS side, click CLOSE.
- Click CONTINUE.
Step 4: Select Services to be Activated
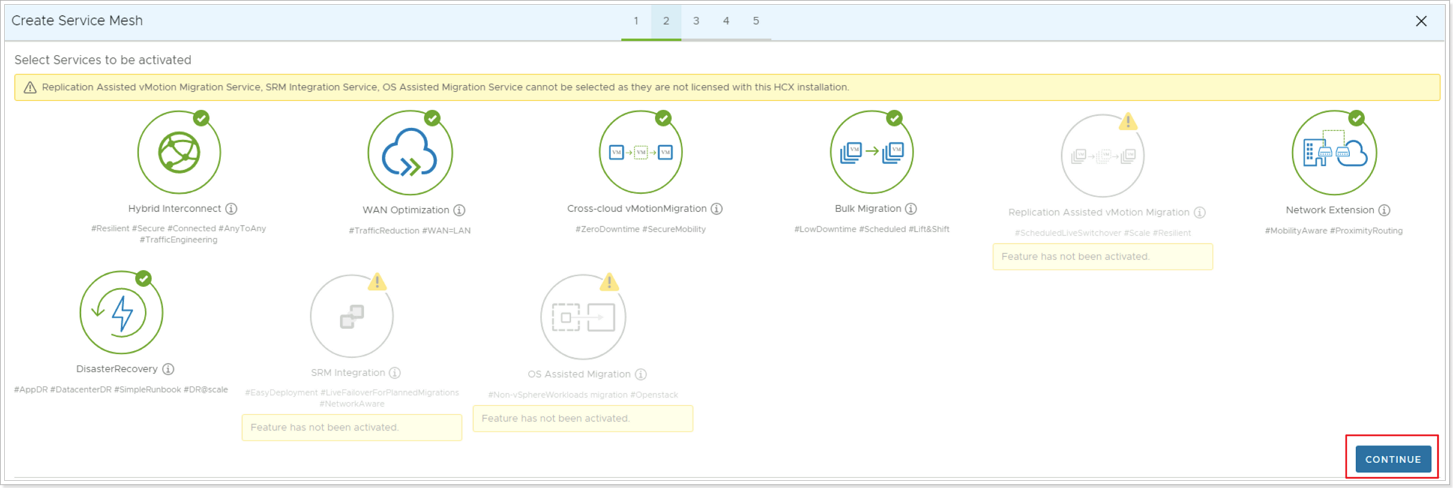
Leave the Default Services and click CONTINUE.
Step 5: Advanced Configuration - Override Uplink Network Profiles
Warning
Due to the current lab setup, please select network OnPrem-management-x-y. However, in typical production scenarios it is more likely to be the Uplink Network Profile.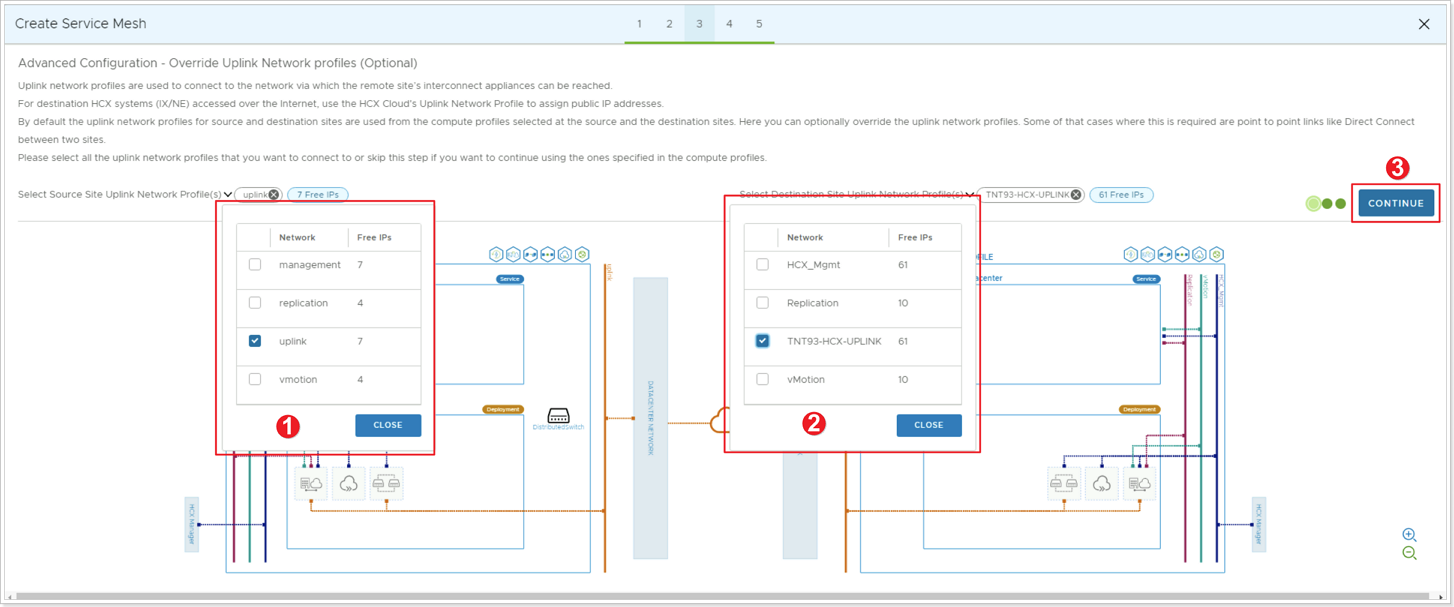
- Click to select the previously created Source Management Network Profile, click CLOSE. Even though you created an Uplink Network Profile, for the purpose of this lab, the management network is used for uplink.
- Click to select the Destination Uplink Network Profile (usually TNTXX-HCX-UPLINK), click CLOSE.
- Click CONTINUE.
Step 6: Advanced Configuration: Network Extension Appliance Scale Out
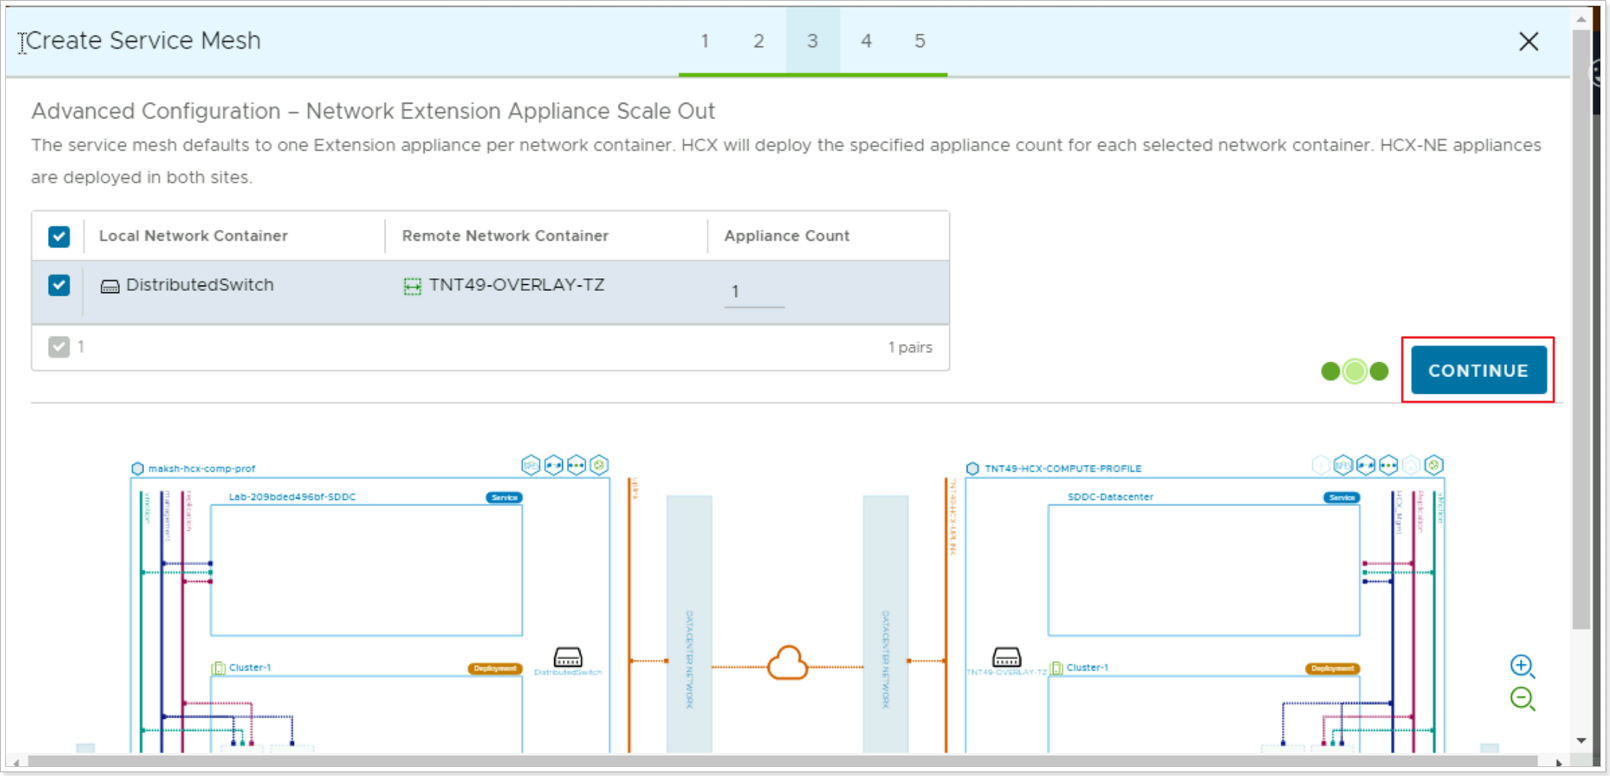
In Advanced Configuration – Network Extension Appliance Scale Out, keep the defaults and then click CONTINUE.
Step 7: Advanced Configuration - Traffic Engineering
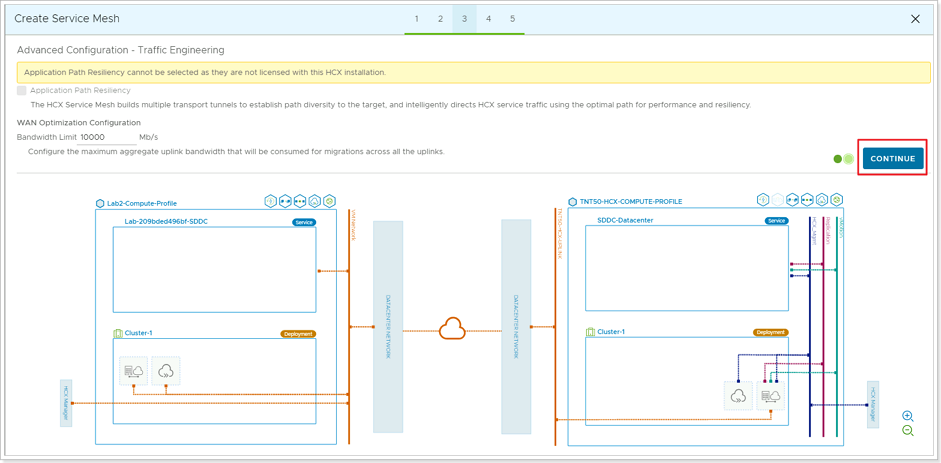
In Advanced Configuration – Traffic Engineering, review, leave the defaults and click CONTINUE.
Step 8: Review Topology Preview
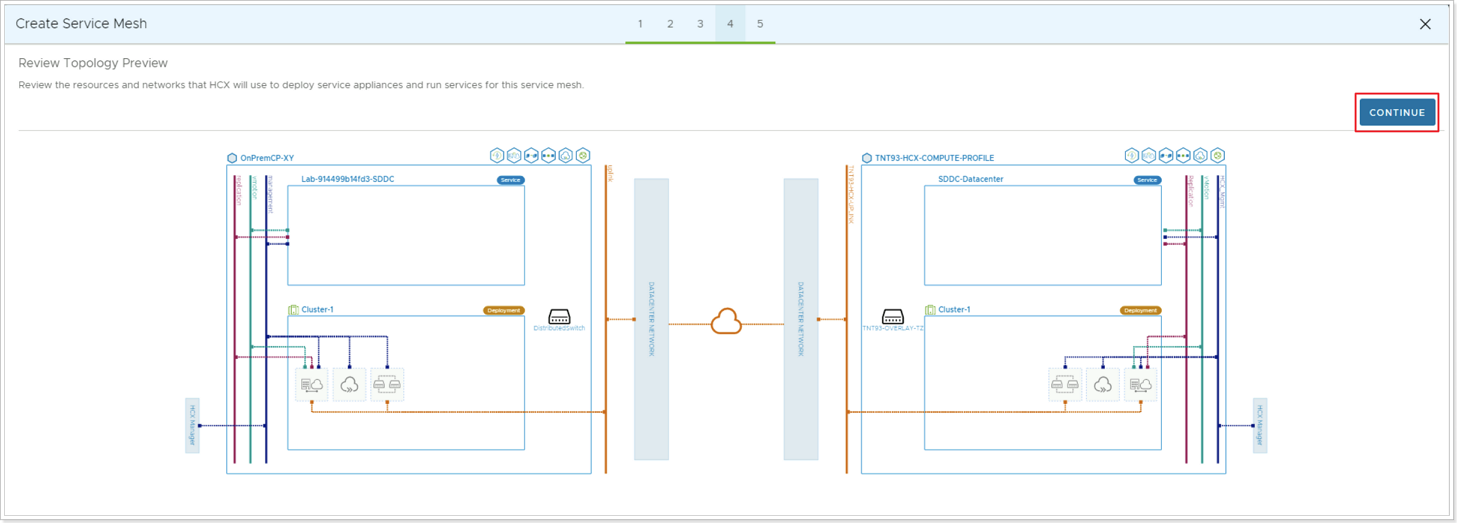
Review the topology preview and click CONTINUE.
Step 9: Ready to Complete
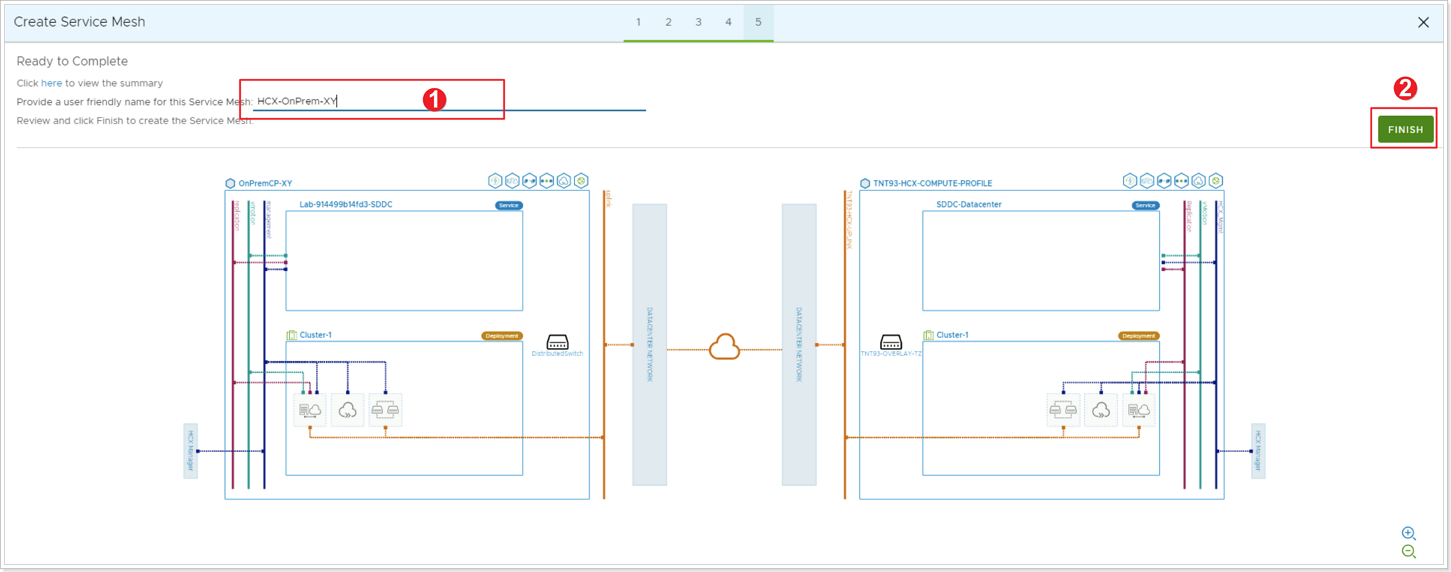
- Enter a name for your Service Mesh (SUGGESTION: HCX-OnPrem-X-Y, where X is your group number, Y your participant number).
- Click FINISH.
Note: the appliance names are derived from service mesh name (it’s the appliance prefix, essentially).
Step 10: Confirm Successful Deployment

The Service Mesh deployment will take 5-10 minutes to complete. Once successful, you will see the services as green. Click on VIEW APPLIANCES.
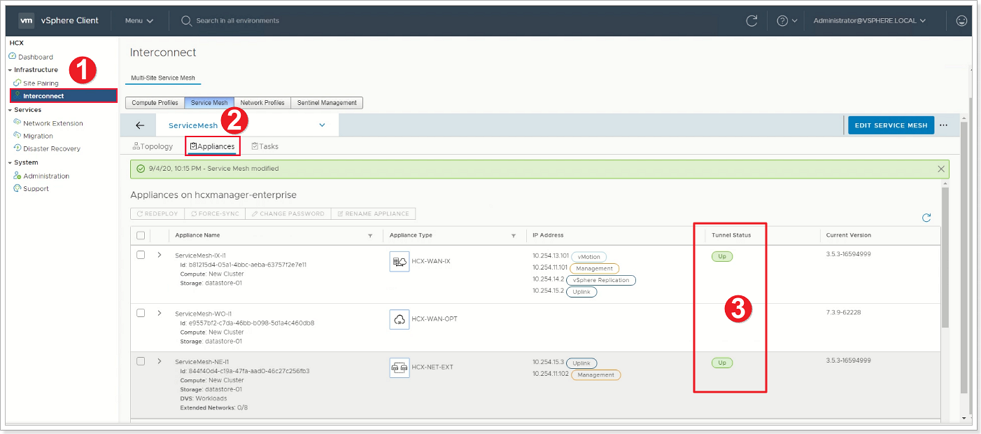
- You can also navigate by clicking Interconnect - Service Mesh.
- Click Appliances.
- Check for Tunnel Status = UP.
You’re ready to migrate and protect on-premises VMs to Azure VMware Solution using VMware HCX. Azure VMware Solution supports workload migrations (with or without a network extension). So you can still migrate workloads in your vSphere environment, along with On-Premises creation of networks and deployment of VMs onto those networks.
For more information, see the VMware HCX Documentation.
Feedback
Was this page helpful?
Glad to hear it! Please tell us how we can improve.
Sorry to hear that. Please tell us how we can improve.