Module 2 Task 3
Task 3: Import the OVA file to the On-Premises vCenter
Import the OVA file to the On-Premises vCenter
In this step we will import the HCX appliance into the on premises vCenter.
You can choose to do this Task in 2 different ways:
Step 1: Obtain your AVS vCenter Server credentials
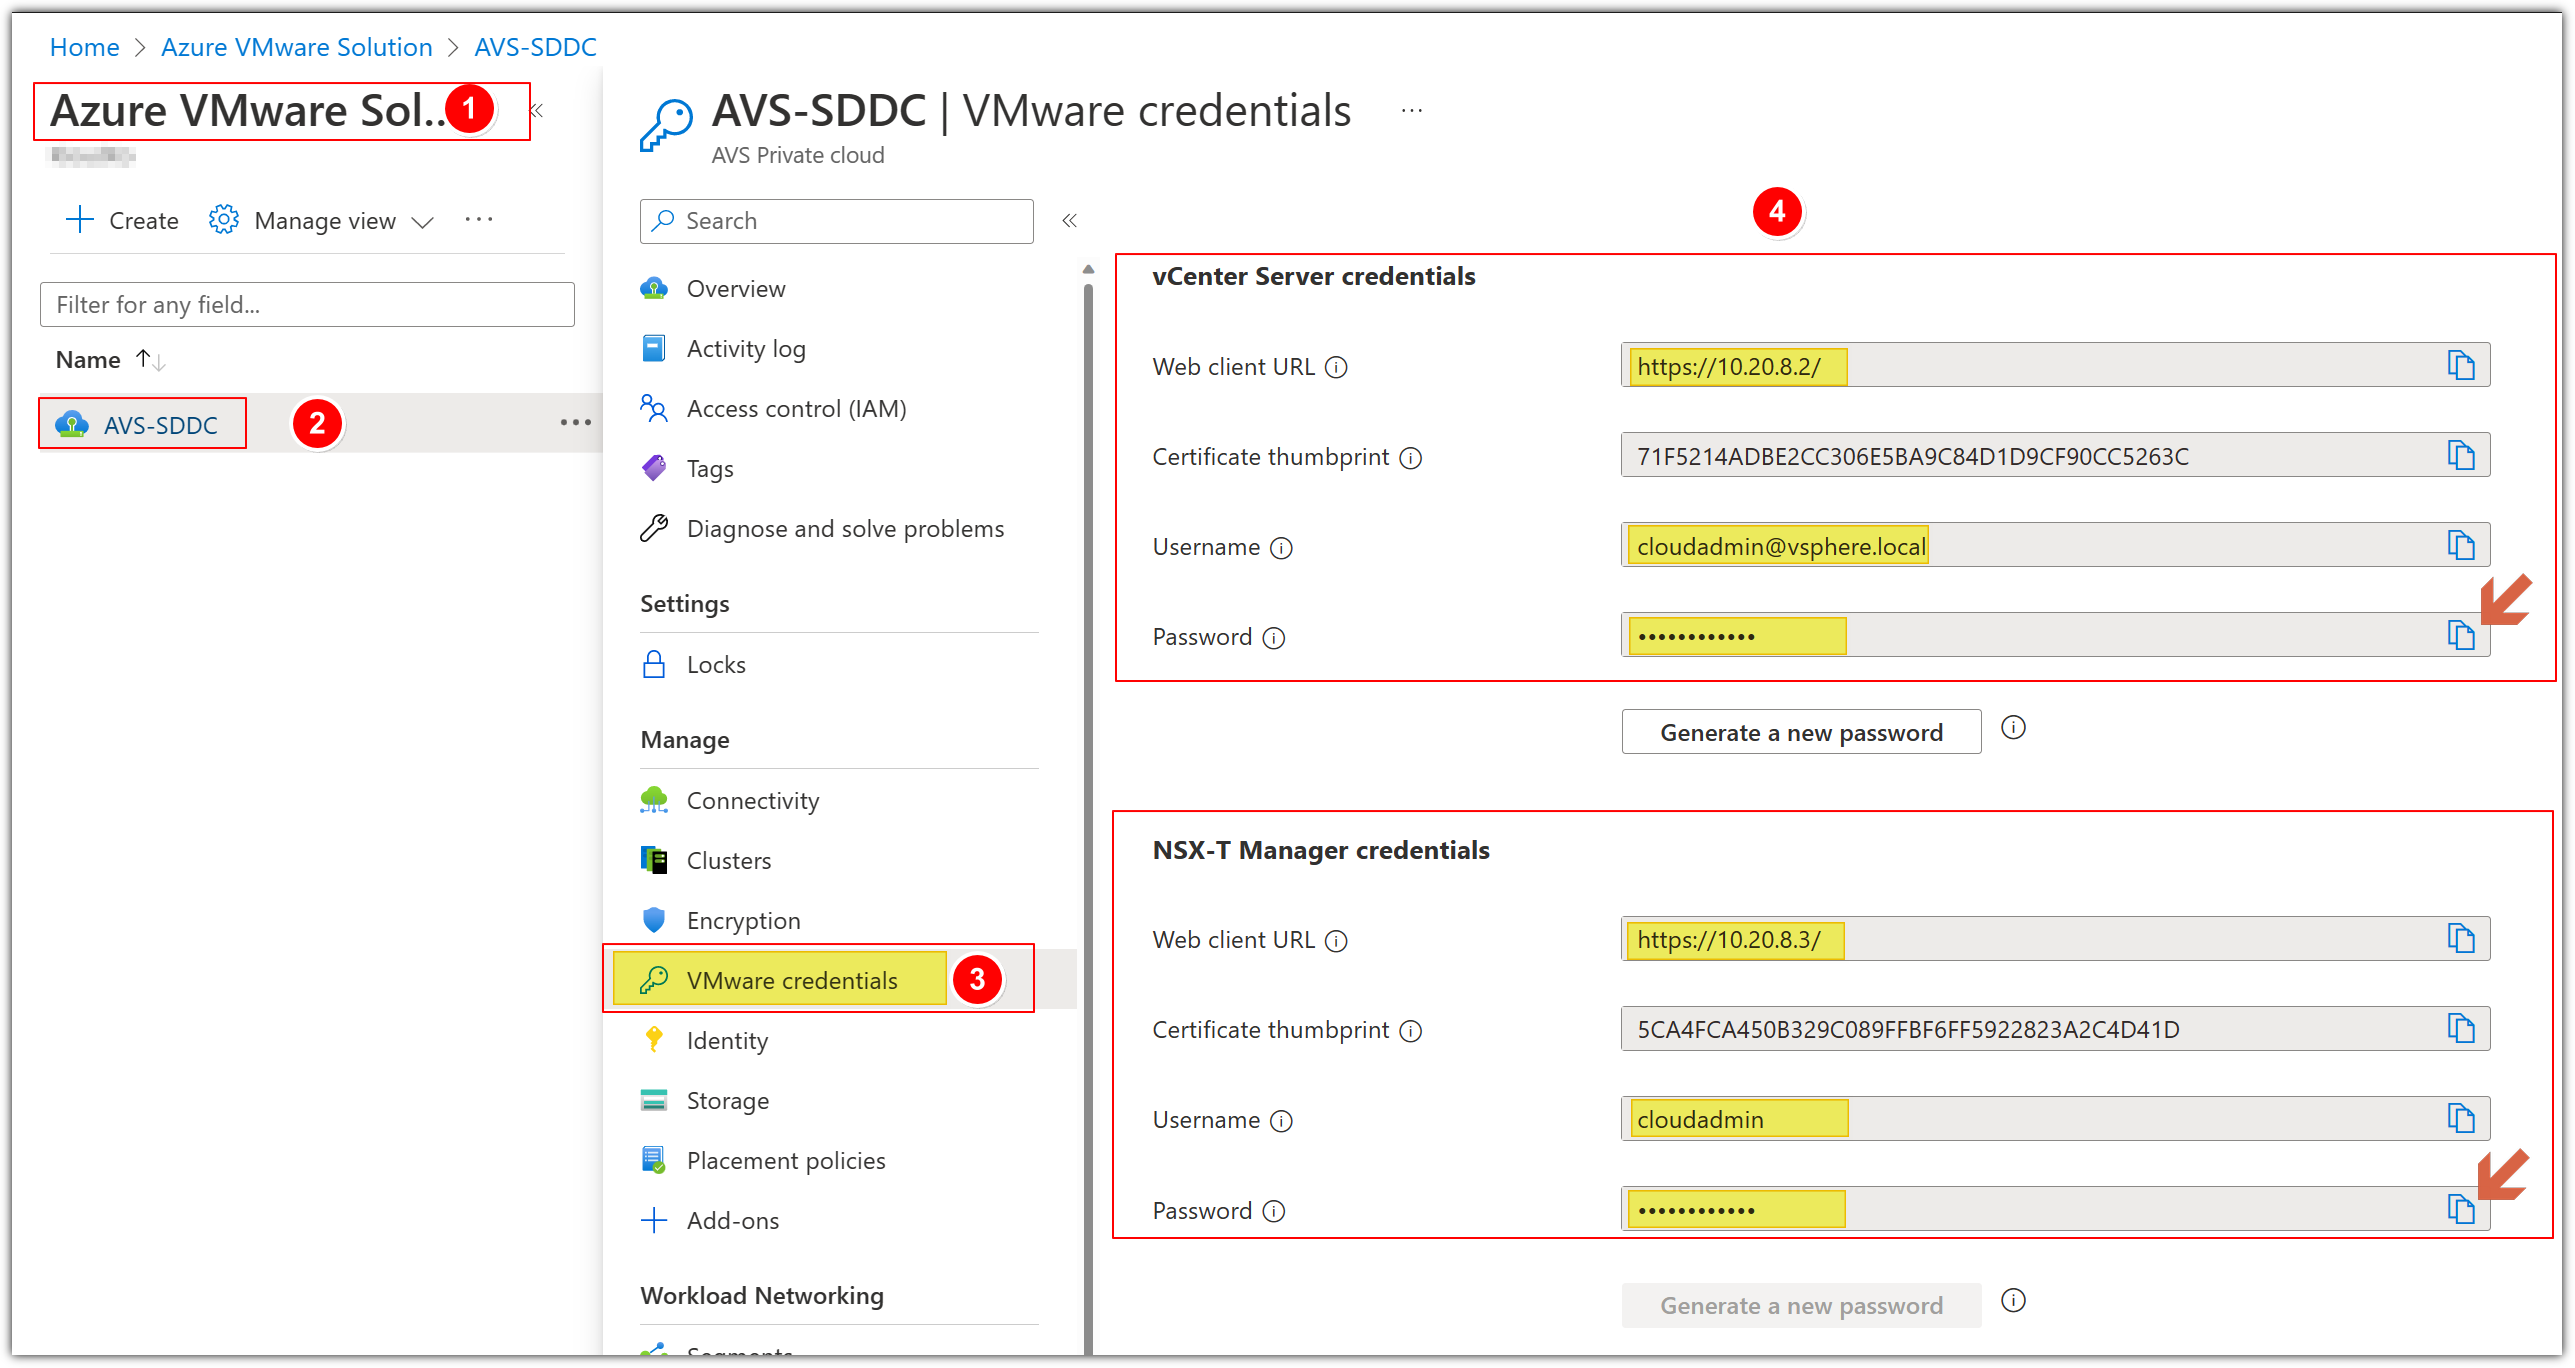
- In your AVS Private Cloud blade click Identity.
- Locate and save both vCenter admin username cloudadmin@vsphere.local and password.
Step 2: Locate HCX Cloud Manager IP
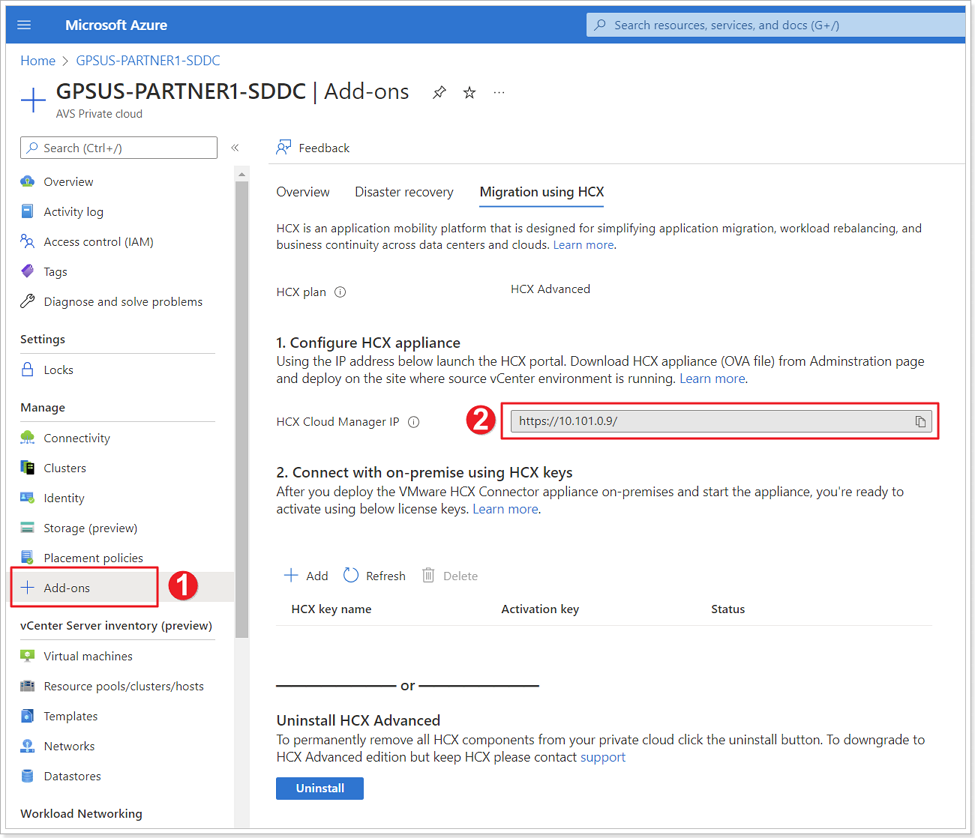
- Click on + Add-ons.
- Copy the HCX Cloud Manager IP.
Step 3: Log in to HCX Cloud Manager IP
You will perform the instructions below from AVS VMware Environment
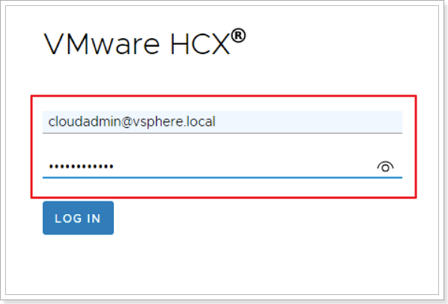
Open a browser tab and paste the HCX Cloud Manager IP and enter the credentials obtained in the previous step.
Step 4: Request Download Link for HCX OVA
- In the left pane click System Updates.
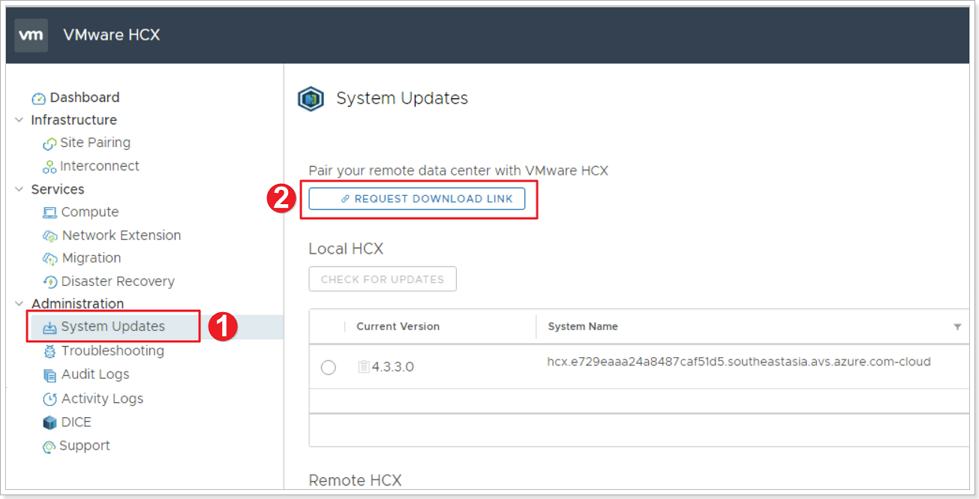
- Click REQUEST DOWNLOAD LINK, please keep in mind that the button might take a couple of minutes to become enabled.
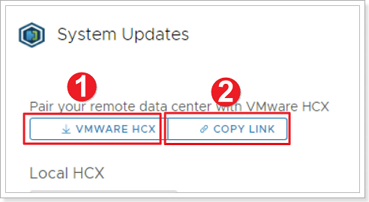
Option 1: Download and deploy HCX OVA to on-premises vCenter
- Click VMWARE HCX to download the HCX OVA localy.
Option 2: Deploy HCX from a vCenter Content Library
- Click COPY LINK if you will install HCX with this method.
You will perform the instructions below from the On-premises VMware Environment
Step 1: Access Content Libraries from on-premises vCenter
Browse to the on-premises vCenter URL, See Getting Started section for more information and login details.
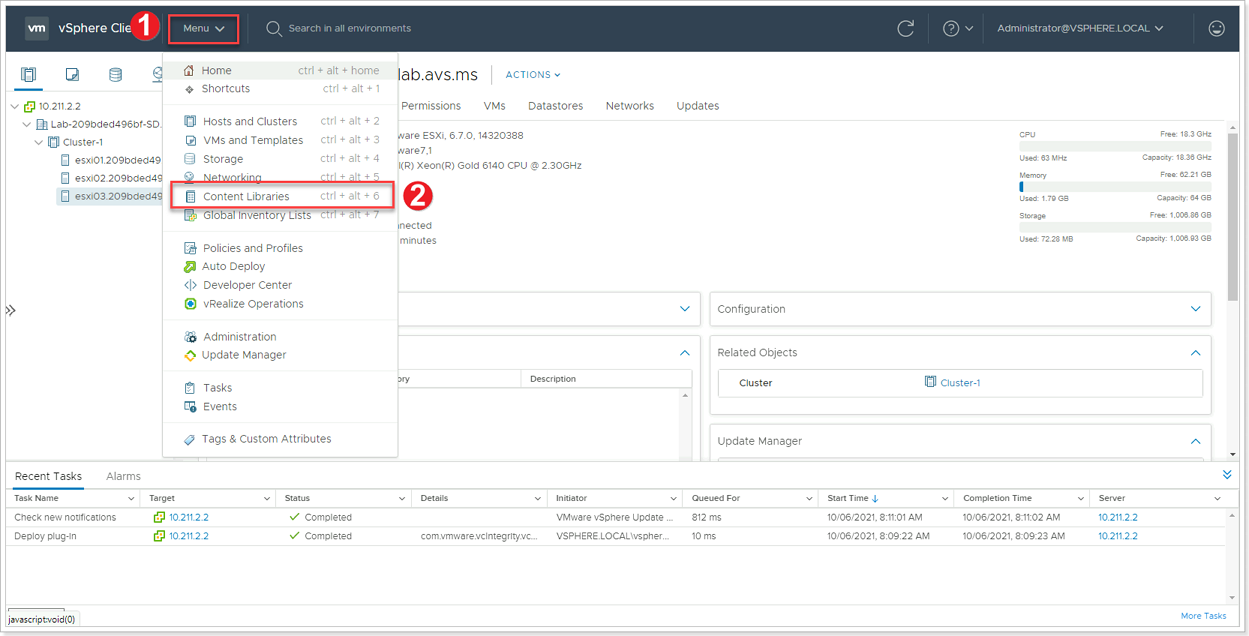
- From your on-premises vCenter click Menu.
- Click Content Libraries.
Step 2: Create a new Content Library
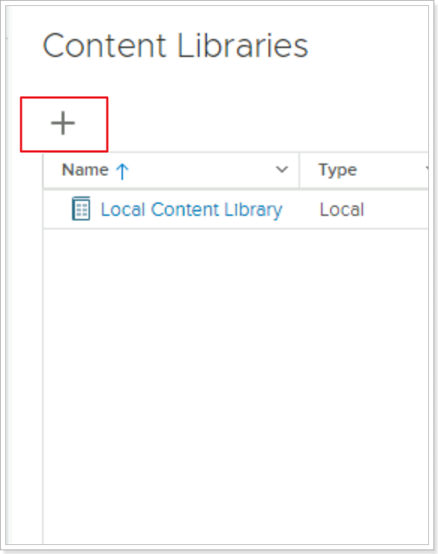
Create a new local content library if one doesn’t exist by clicking the + sign.
Step 3: Import Item to Content Library
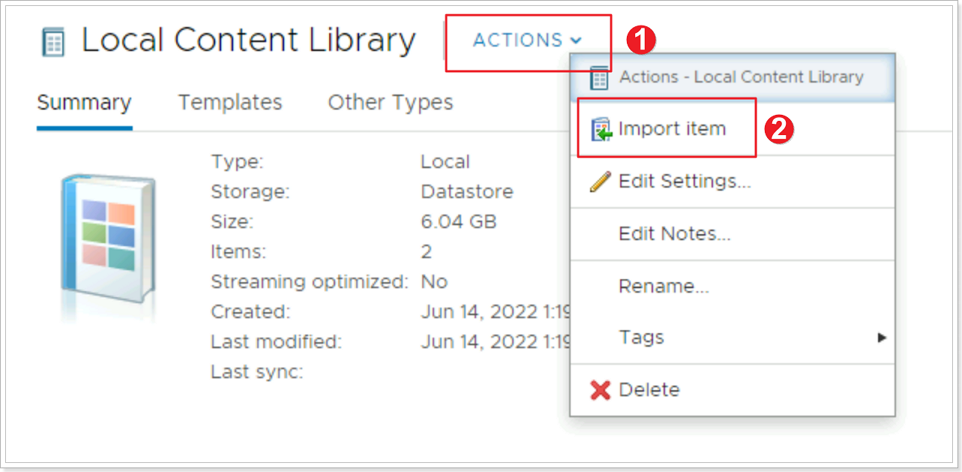
- Click ACTIONS.
- Click Import Item.
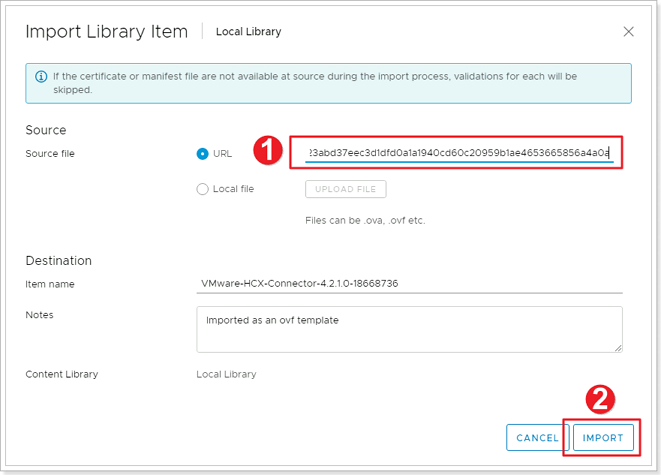
- Enter the HCX URL copied in a previous step.
- Click IMPORT.
Accept any prompts and actions and proceed. The HCX OVA will download to the library in the background.
Feedback
Was this page helpful?
Glad to hear it! Please tell us how we can improve.
Sorry to hear that. Please tell us how we can improve.
Last modified December 17, 2024: update workflow (8881230)