Module 2 Task 4
Task 4: Deploy the HCX OVA to On-Premises vCenter
Deploy HCX OVA
In this step, we will deploy the HCX VM with the configuration from the On-Premises VMware Lab Environment section.
You will perform the instructions below from the On-premises VMware Environment
Step 1: Deploy HCX connector VM
If Option 1: Deploy OVA from download.
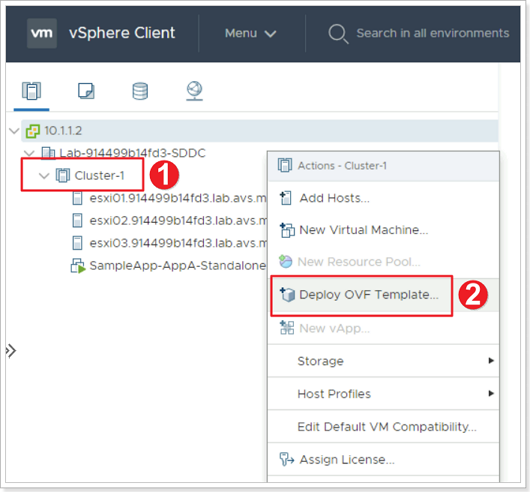
- Right-click Cluster-1.
- Click Deploy OVF Template.
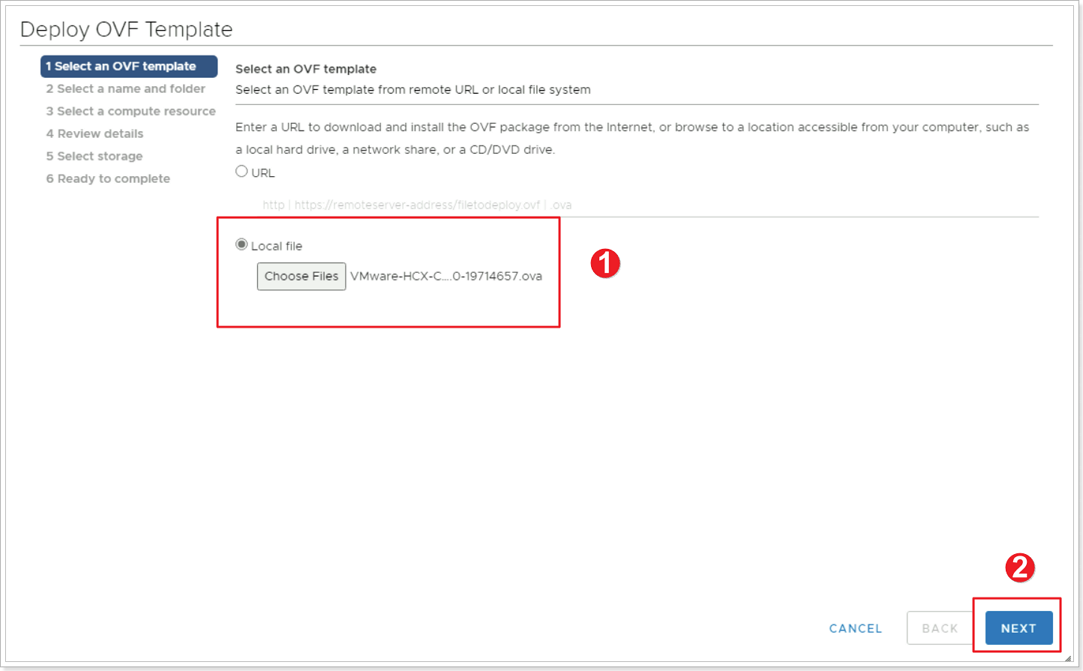
- Click the button to point to the location of the downloaded OVA for HCX.
- Click NEXT.
If Option 2: Deploy HCX from Content Library
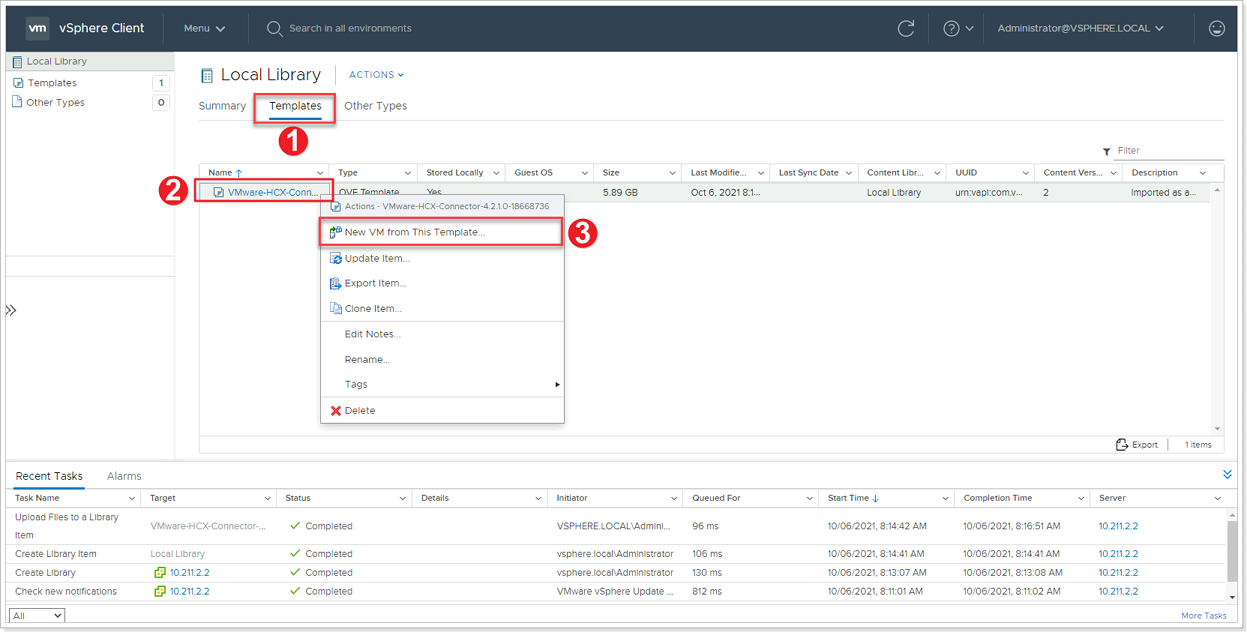
- Once the import is completed from the previous task, click Templates.
- Right Click the imported HCX template.
- Click New VM from This Template.
- Give your HCX Connector a name: HCX-OnPrem-X-Y, where X is your group number and Y is your participant number.
- Click NEXT.
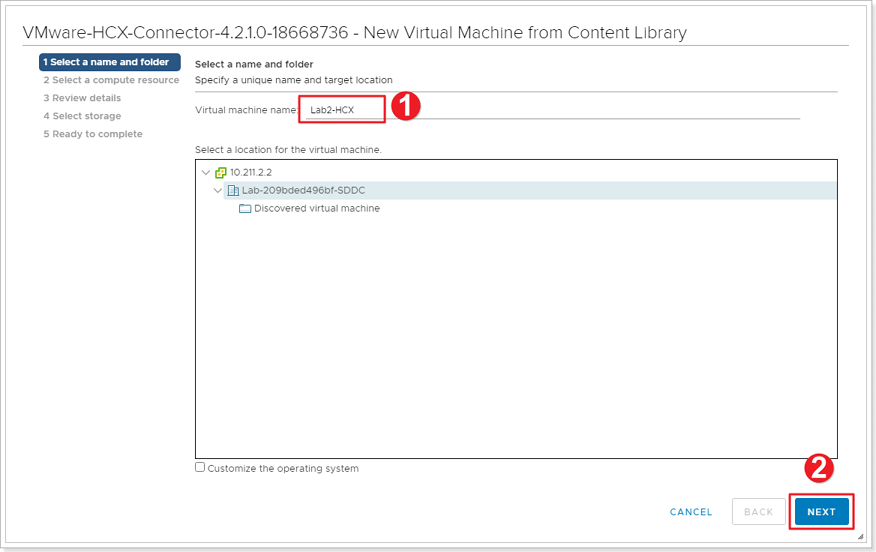
Step 2: Name the HCX Connector VM
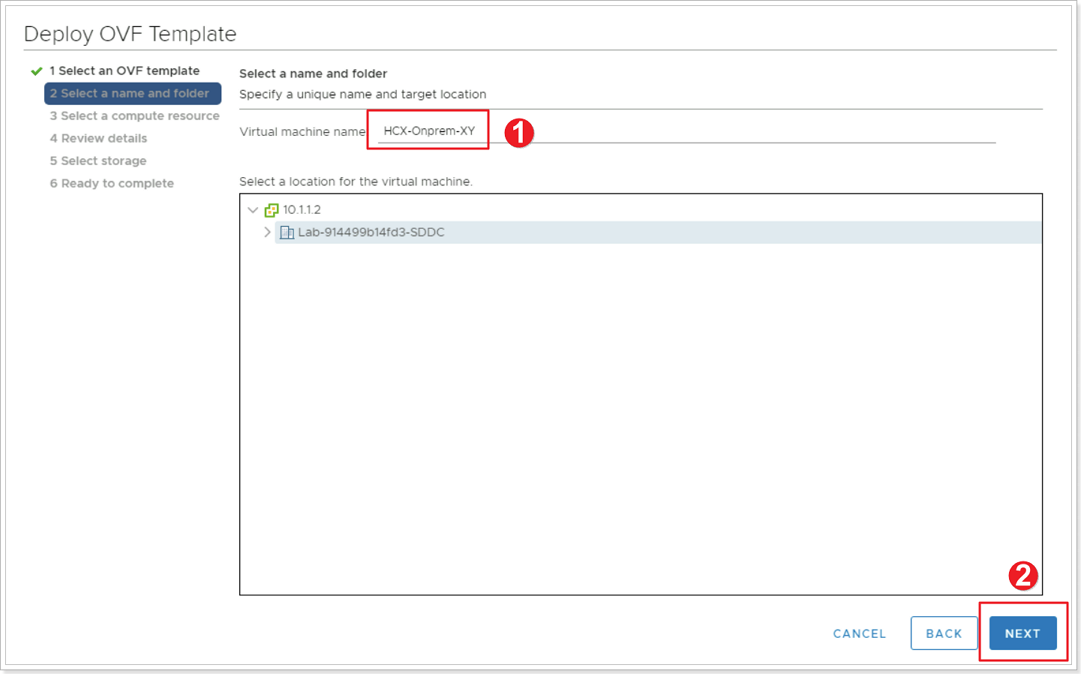
- Give your HCX Connector a name: HCX-OnPrem-X-Y, where X is your group number and Y is your participant number.
- Click NEXT.
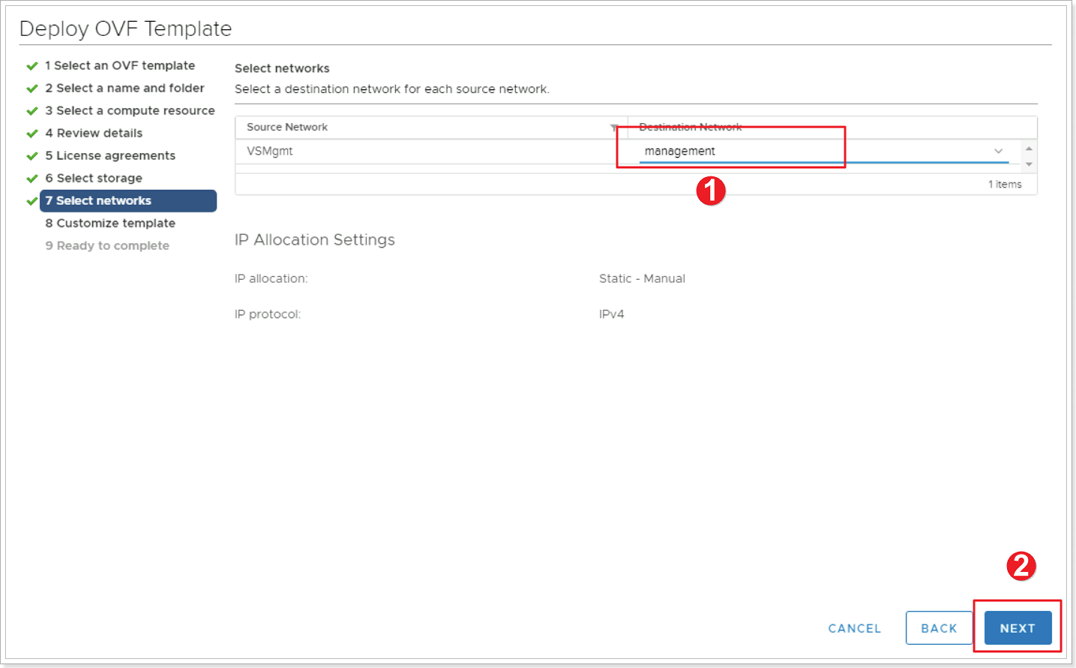
Step 3: Assign the network to your HCX Connector VM
Keep the defaults for:
- Compute Resource
- Review details
- License agreements (Accept)
- Storage (LabDatastore)
- Click to select management network.
- Click NEXT.
Step 4: Customize template
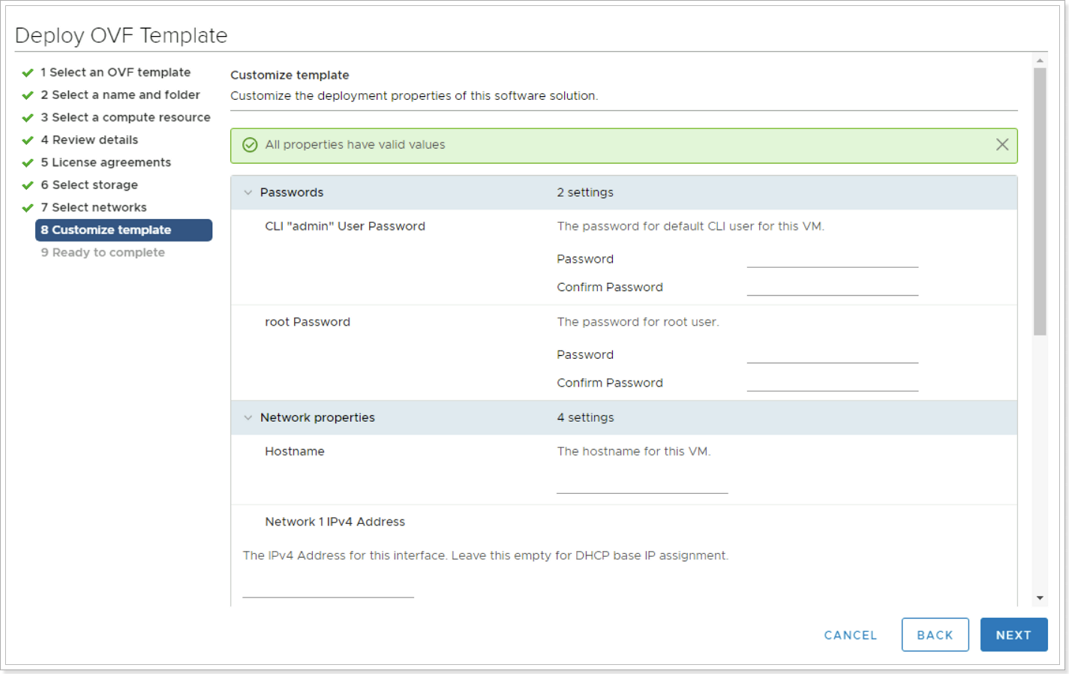
| Property | Value |
|---|---|
| Hostname | Suggestion: HCX-OnPrem-X-Y) Note: Do not leave a space in the name as this causes the webserver to fail) |
| CLI “admin” User Password/root Password | MSFTavs1! |
| Network 1 IPv4 Address | 10.X.Y.9 |
| Network 1 IPv4 Prefix Length | 27 |
| Default IPv4 Gateway | 10.X.Y.1 |
| DNS Server list | 1.1.1.1 |
Step 5: Validate deployment
Once done, navigate to Menu > VM’s and Templates > Power on the newly created HCX Manager VM.
The boot process may take 10-15 minutes to complete.
Feedback
Was this page helpful?
Glad to hear it! Please tell us how we can improve.
Sorry to hear that. Please tell us how we can improve.
Last modified December 17, 2024: update workflow (8881230)