Module 2 Task 7
Task 7: Configure HCX and connect to vCenter
You will perform the instructions below from the On-premises VMware Environment
Configure On-Premises HCX
In this section, we will integrate and configure HCX Manager with the On-Premises vCenter Server.
Step 1: Connect vCenter Server
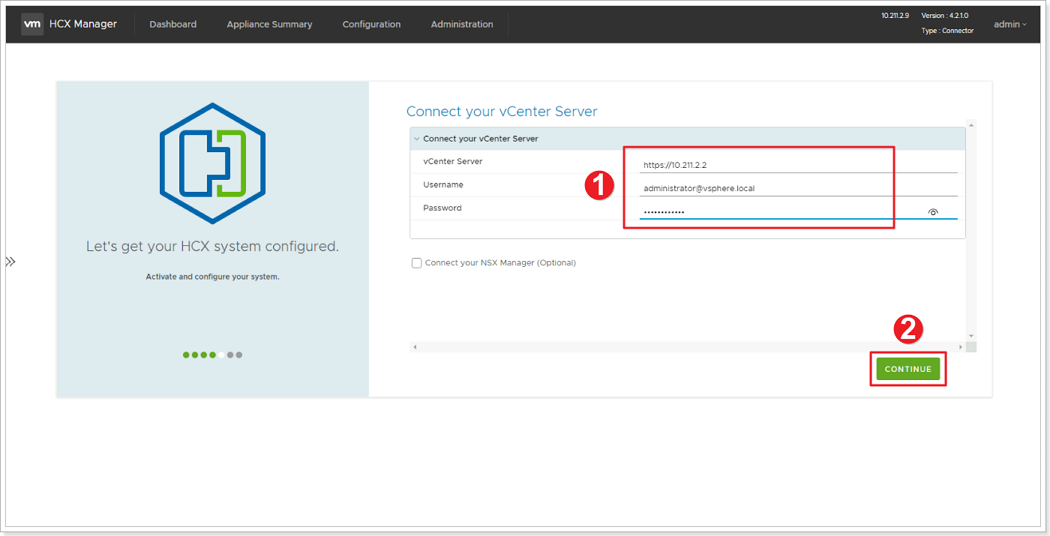
- In Connect your vCenter, provide the FQDN or IP address of on-premises vCenter server and the appropriate credentials.
- vCenter IP: https://10.X.Y.2
- Username:
administrator@avs.lab - Password:
MSFTavs1!
- Click CONTINUE.
Step 2: Configure SSO/PSC
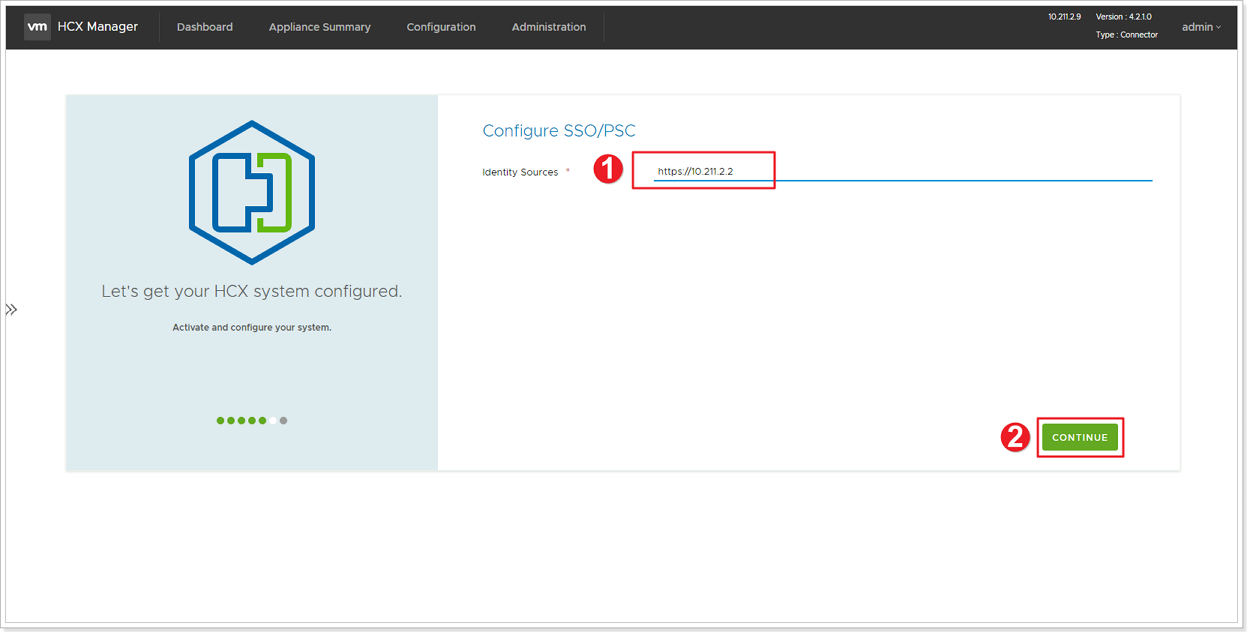
- In Configure SSO/PSC, provide the same vCenter IP address: https://10.X.Y.2
- Click CONTINUE.
Step 3: Restart HCX Appliance
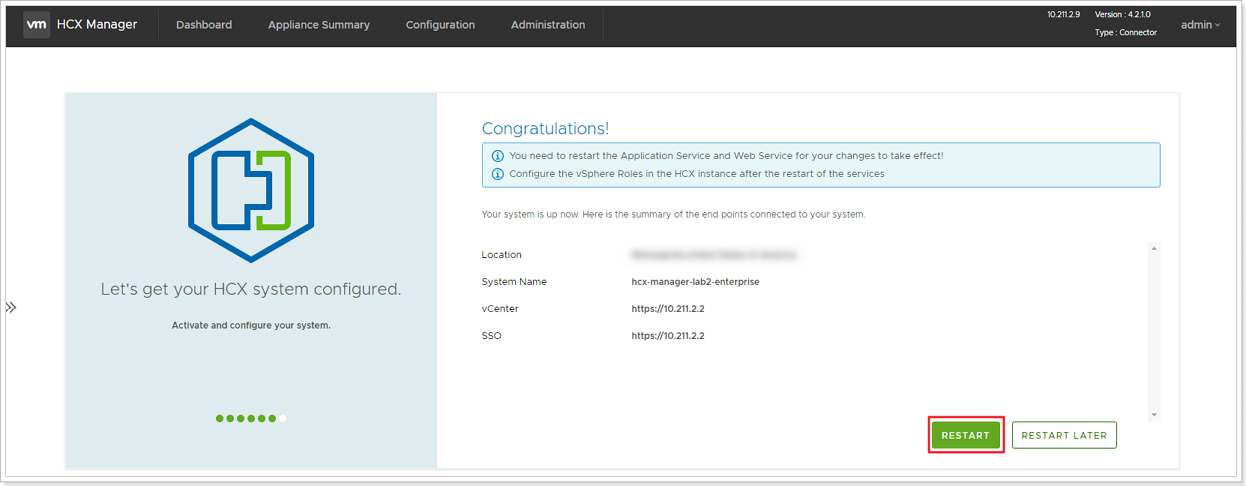
Verify that the information entered is correct and select RESTART.
The Reboot process might take up to 15 minutes
The reboot process might take between 10 to 15 minutes. Keep checking every 3-4 minutes to ensure you can get to HCX Manager.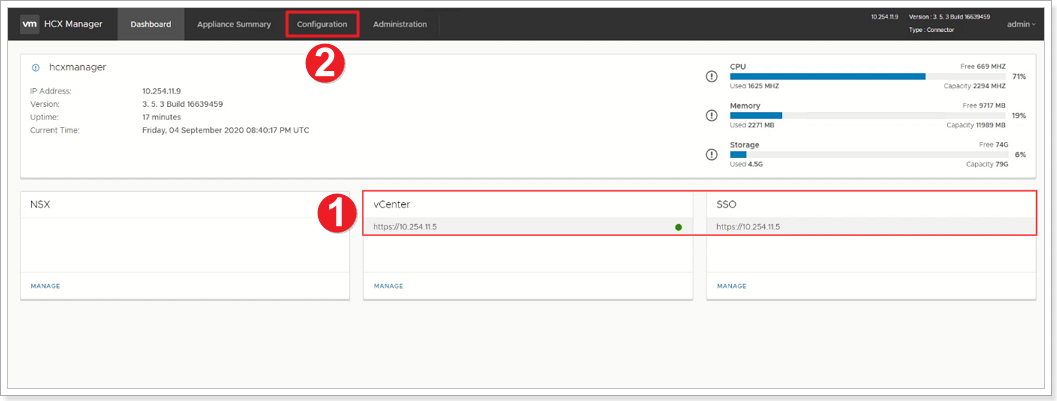
- After the services restart, you’ll see vCenter showing as Green on the screen that appears. Both vCenter and SSO must have the appropriate configuration parameters, which should be the same as the previous screen.
- Next, click on Configuration to complete the HCX configuration.
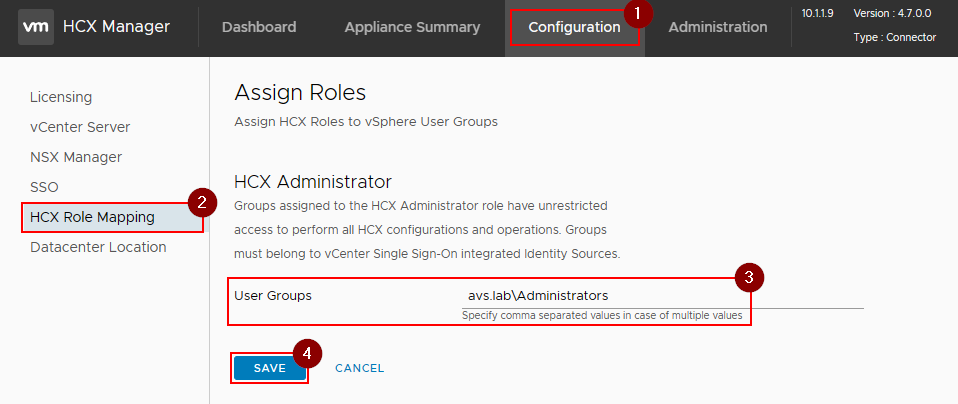
- Click Configuration.
- Click HCX Role Mapping.
- Click Edit.
- Change User Groups value to match lab SSO configuration:
avs.lab\Administrators - Save changes.
Please note that by default HCX assigns the HCX administrator role to “vsphere.local\Administrators”. In real life, customers will have a different SSO domain than vsphere.local and needs to be changed. This is the case for this lab and this needs to be changed to avs.lab.
It may take an additional 5-10 minutes for the HCX plugins to be installed in vCenter, log back out and log back in if it does not show up automatically.
Feedback
Was this page helpful?
Glad to hear it! Please tell us how we can improve.
Sorry to hear that. Please tell us how we can improve.
Last modified December 17, 2024: update workflow (8881230)