Module 3 Task 5
SRM Inventory Mappings
Remember X is your group number, Y is your participant number, Z is the SDDC you’ve been paired with.
In this task you will configure inventory mappings, which define the resources (networks, folders, compute resources, storage policies) that VMs must use when moved to the recovery site. It is also possible to define reverse mappings, which control resource allocation for failback processes.
Exercise 1: Network mappings
Step 1: Log in to Site Recovery Manager

In the Site Recovery interface, click the VIEW DETAILS button on the paired sites.
Step 2: Authenticate to Recovery Site
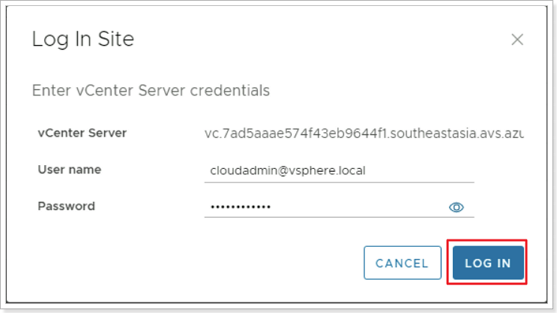
You may need to re-authenticate to the recovery site. Enter those credentials and click LOG IN.
Step 3: Create New Network Mapping
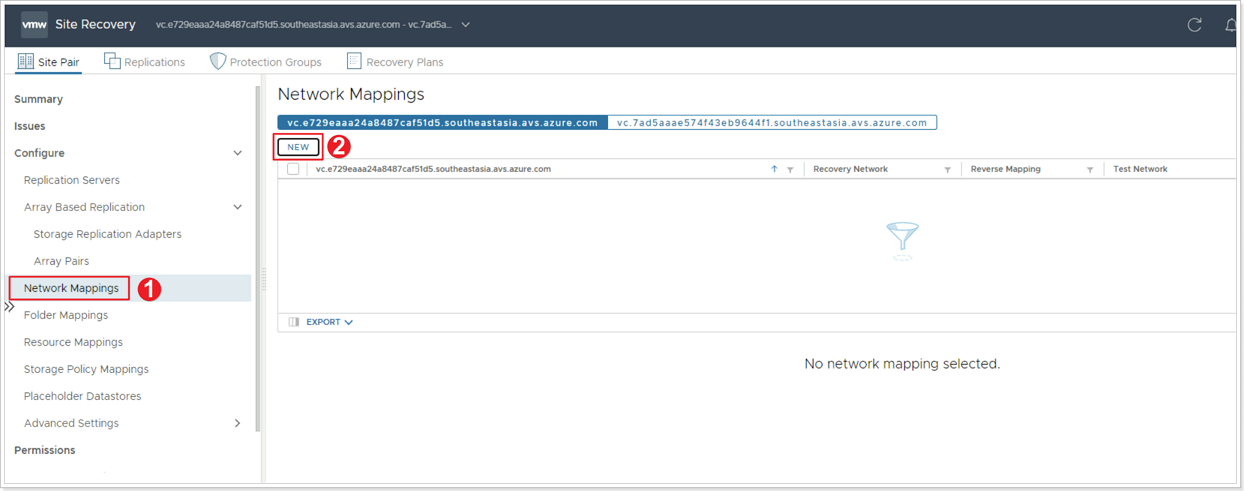
- Click Network Mappings in the left pane.
- Click NEW.
Step 4: Network Mappings Creation Mode
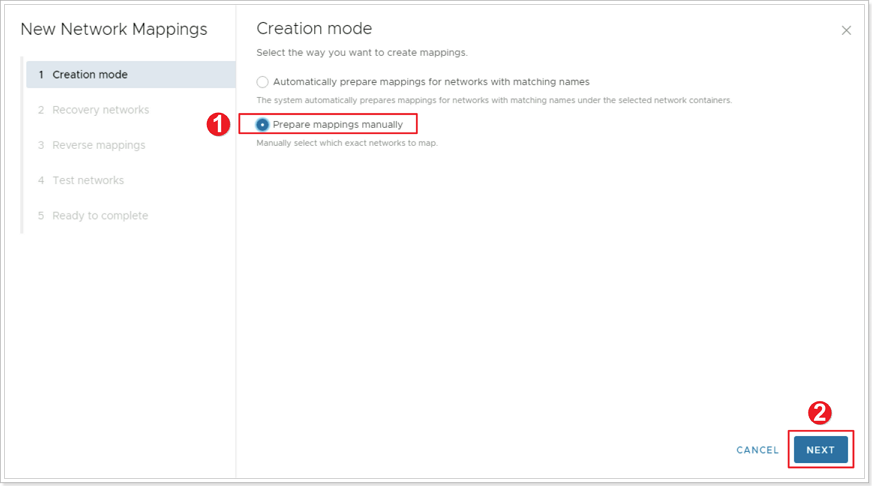
- Click to select Prepare mappings manually.
- Click NEXT.
Step 5: Configure Recovery Network Mappings
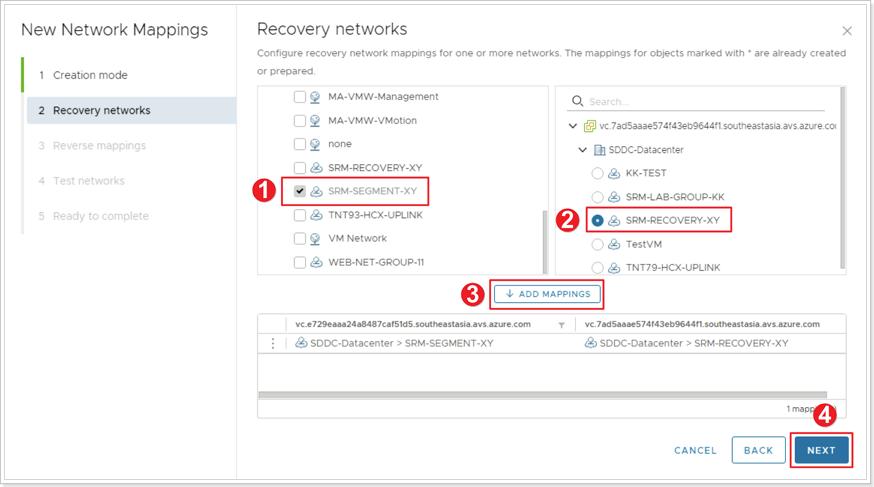
- Select first the SRM Protected Segment created earlier called SRM-SEGMENT-XY.
- On the right side select SRM-REcOVERY-XY.
- Click ADD MAPPINGS button.
- Click NEXT.
Step 6: Configure Reverse Mappings
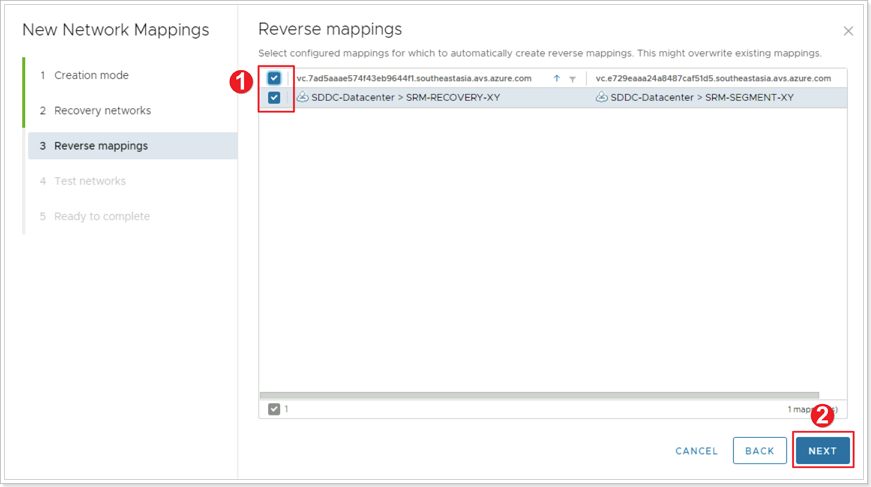
- Select the checkbox to set the reverse mappings for the network.
- Click NEXT.
Step 7: Test Networks
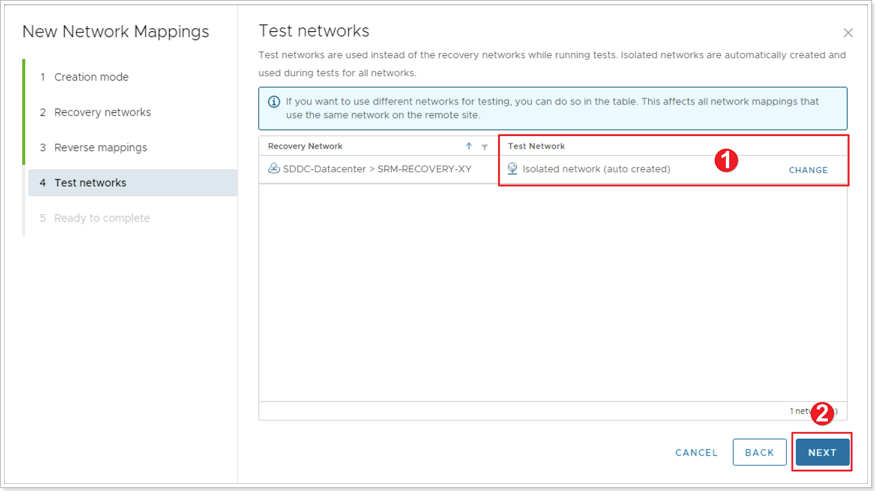
- Define a Test Network. SRM allows you to specify a test network your recovered VMs will connect to when performing a DR test or you can let SRM auto create the test networks. For the purposes of this workshop leave the default of auto created.
- Click NEXT.
Step 8: Complete Network Mappings
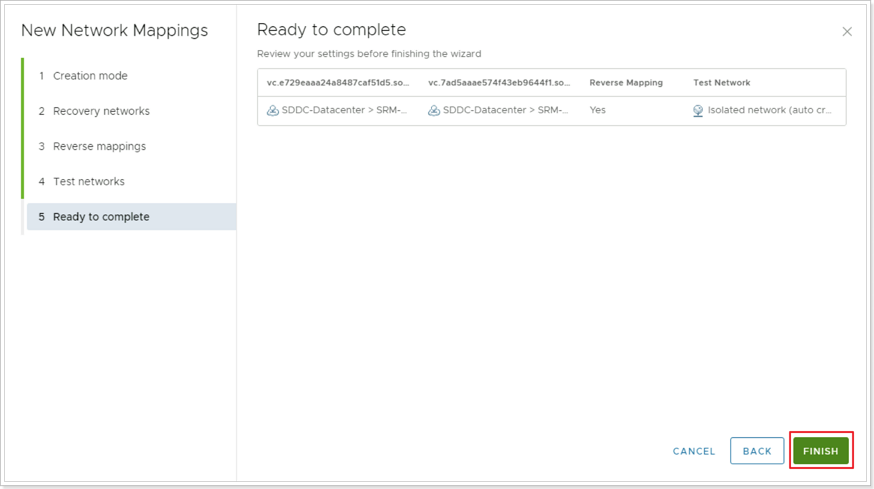
To complete the network mappings setup click FINISH.
Exercise 2: Folder Mappings
Step 1: New Folder Mappings
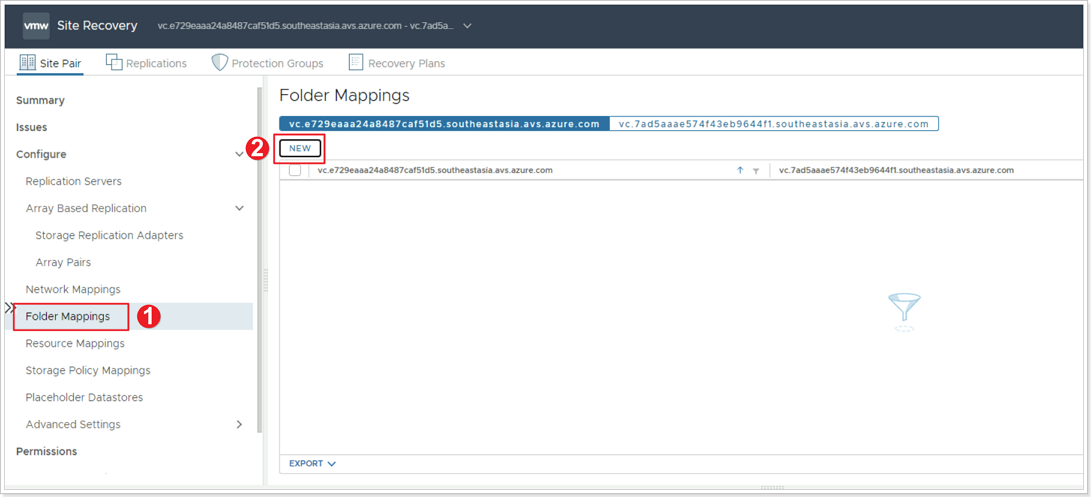
- Click Folder Mappings.
- Click NEW.
Step 2: Folder Mappings Creation Mode

- Ensure Automatically prepare mappings for folders with matching names is selected.
- Click NEXT.
Step 3: Configure Recovery Folders
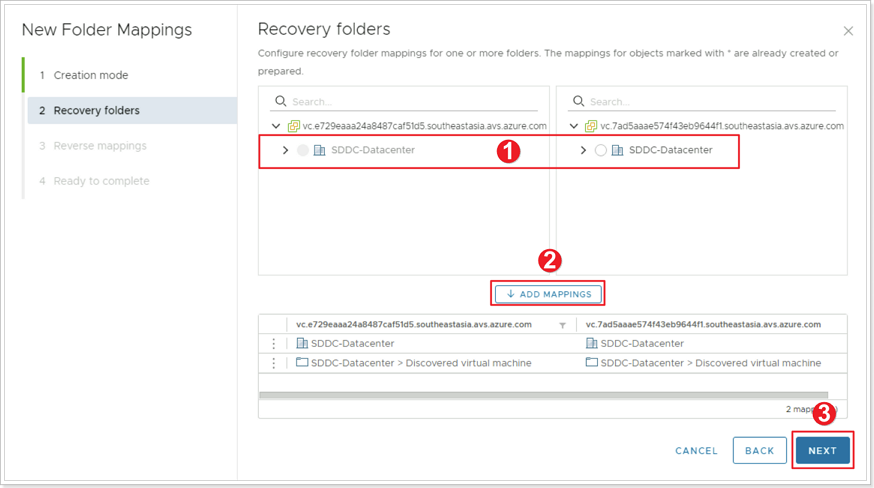
- Select SDDC-Datacenter on both sides.
- Click ADD MAPPINGS.
- Click NEXT.
Step 4: Folder Reverse Mappings
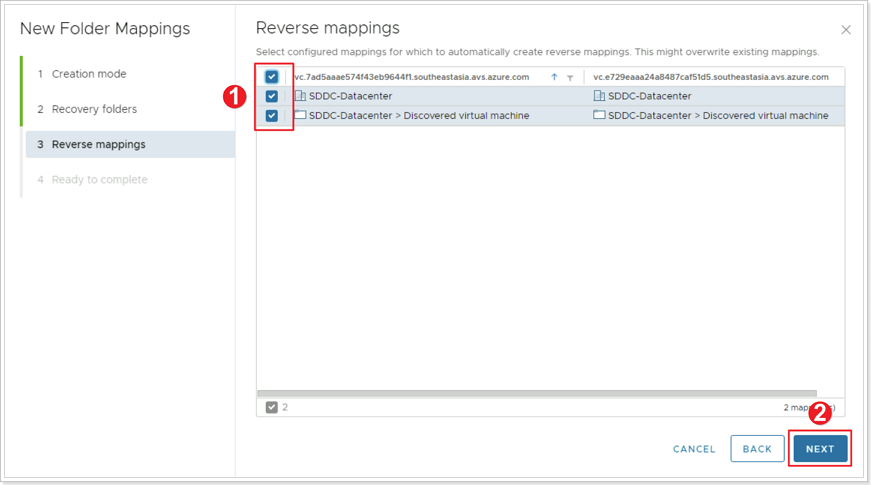
- Select all checkboxes to create the folder reverse mappings.
- Click NEXT.
Step 5: Complete Folder Mappings
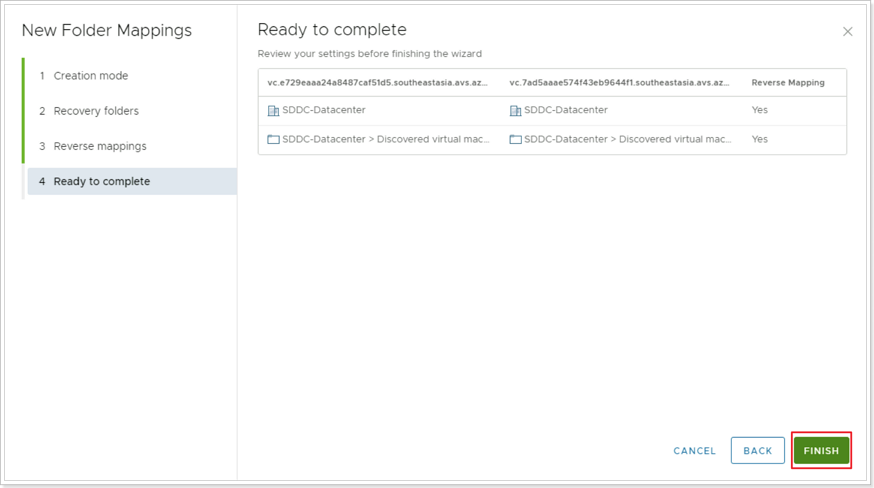
Click FINISH button to complete Folder Mappings.
Exercise 3: Resource Mappings
Step 1: Create New Resource Mapping
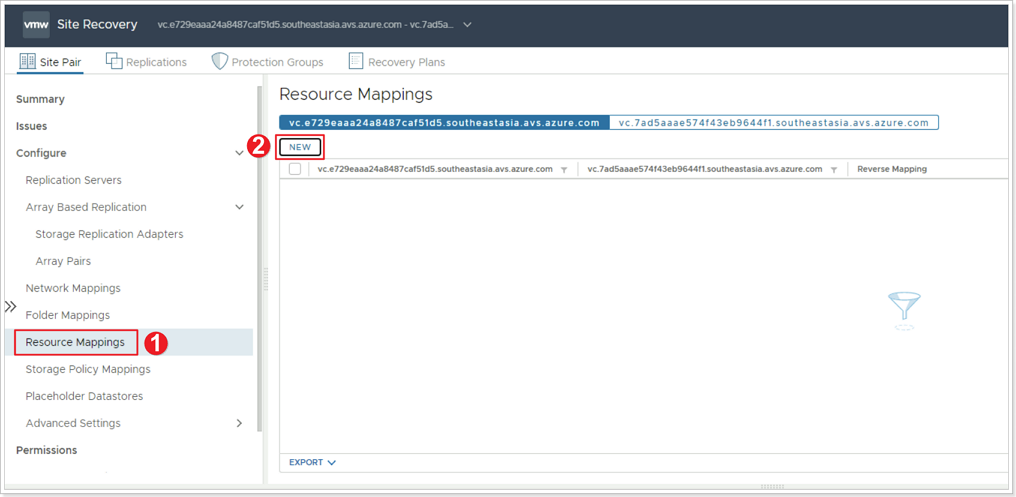
- Click Resource Mappings.
- Click NEW.
Step 2: Configure Recovery Resource Mappings

- Expand SDDC-Datacenter on both sides and select Cluster-1.
- Click ADD MAPPINGS.
- Click NEXT.
Step 3: Reverse Mappings
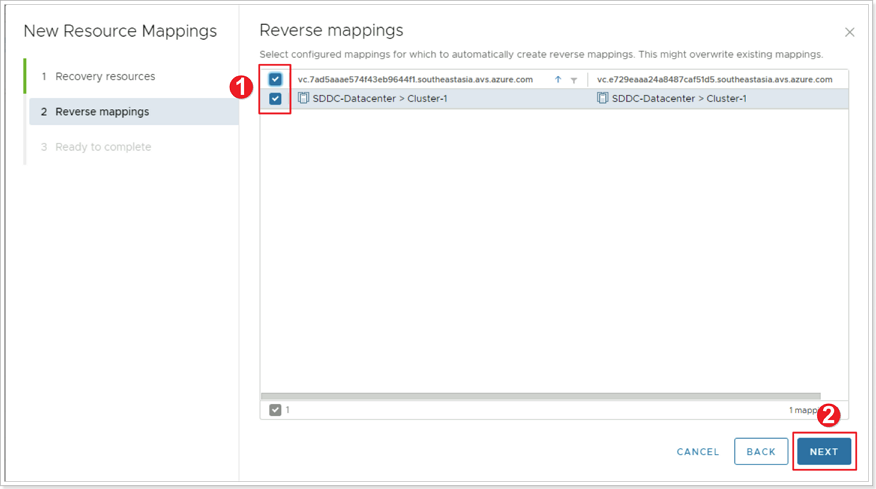
- Select all checkboxes to create the resource reverse mappings.
- Click NEXT.
Step 4: Complete Resource Mappings
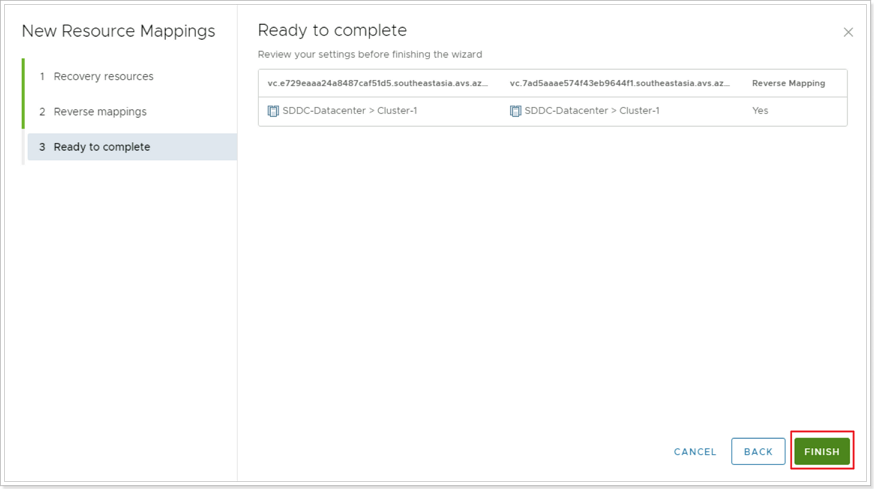
Click FINISH button to complete Resource Mappings.
Exercise 4: Storage Policy Mappings
Step 1: Create New Storage Policy Mappings
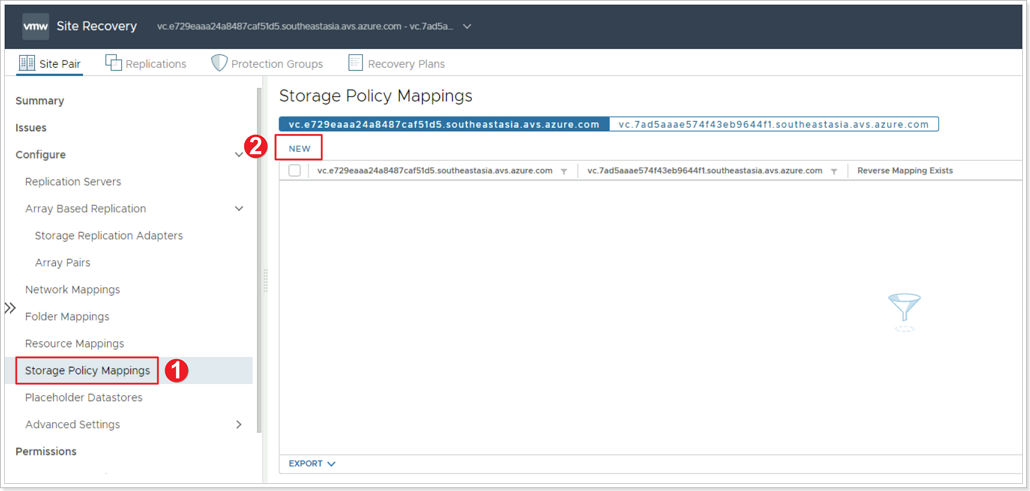
- Click Storage Policy Mappings.
- Click NEW.
Step 2: Storage Policy Creation Mode
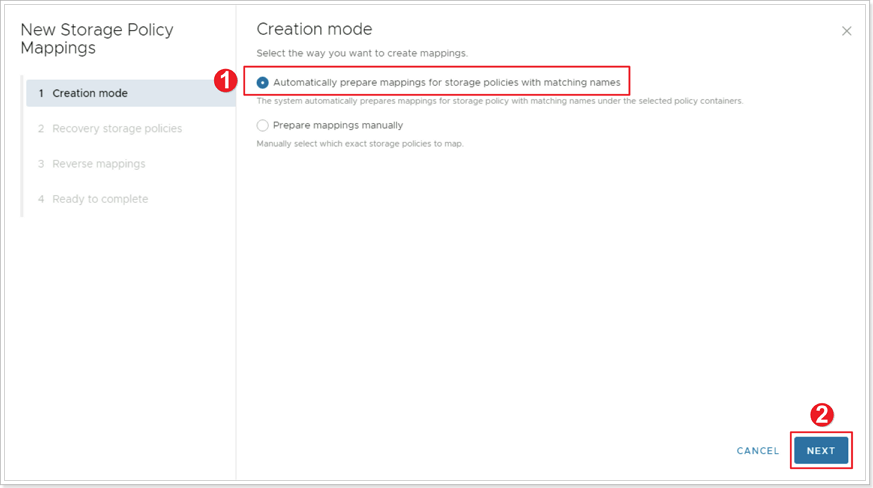
- Ensure Automatically prepare mappings for storage policies with matching names is selected.
- Click NEXT.
Step 3: Configure Recovery Storage Policy Mappings
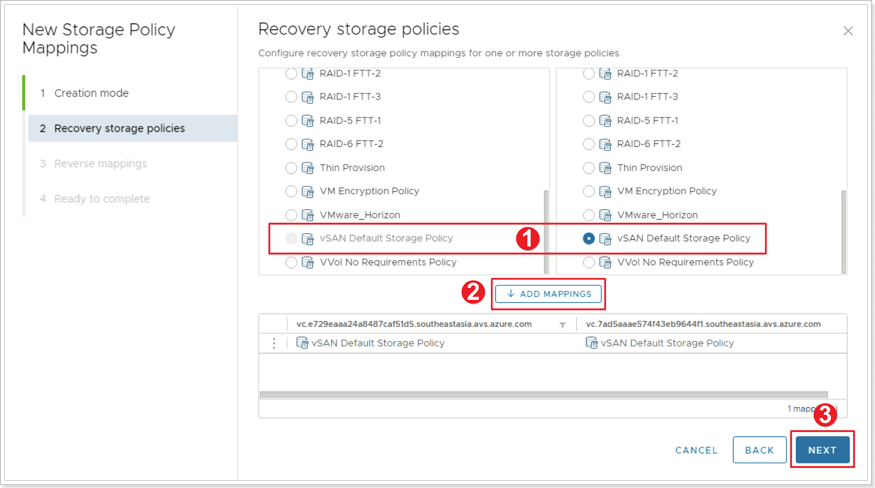
- Click and select vSAN Default Storage Policy on both sides.
- Click ADD MAPPINGS.
- Click NEXT.
Step 4: Reverse Mappings
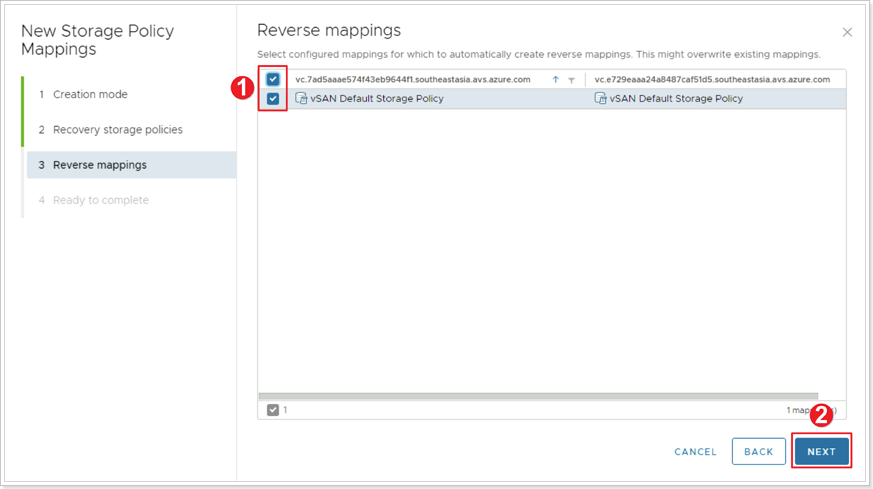
- Select all checkboxes to create the Storage Policy Reverse Mappings.
- Click NEXT.
Step 5: Complete Storage Policy Mappings
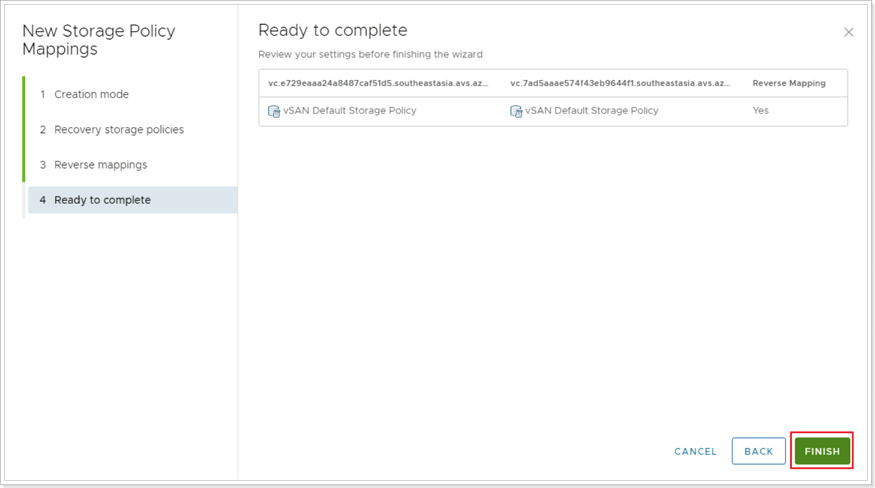
Click FINISH button to complete the Storage Policy Mappings.
Placeholder Datastores
For this exercise there’s no need to create a Placeholder Datastore. If there’s no Placeholder Datastore, you are free to go and create one, just select the vsanDatastore.
Feedback
Was this page helpful?
Glad to hear it! Please tell us how we can improve.
Sorry to hear that. Please tell us how we can improve.