Module 4 Task 3
Task 3: Configure Azure Firewall policies
Azure Firewall Policies
Exercise 1: Azure Firewall Policies
Step 1: Navigate to Azure Firewall

- In the Azure Portal search bar type Firewalls.
- Click Firewalls.
Step 2: Select your Virtual WAN Firewall
Select your virtual WAN Firewall that should have been automatically created after the previous task.
Step 3: Azure Firewall Manager

- Click Firewall Manager.
- Click to Visit Azure Firewall Manager to configure and manage this firewall.
Step 4: Access Azure Firewall Policies
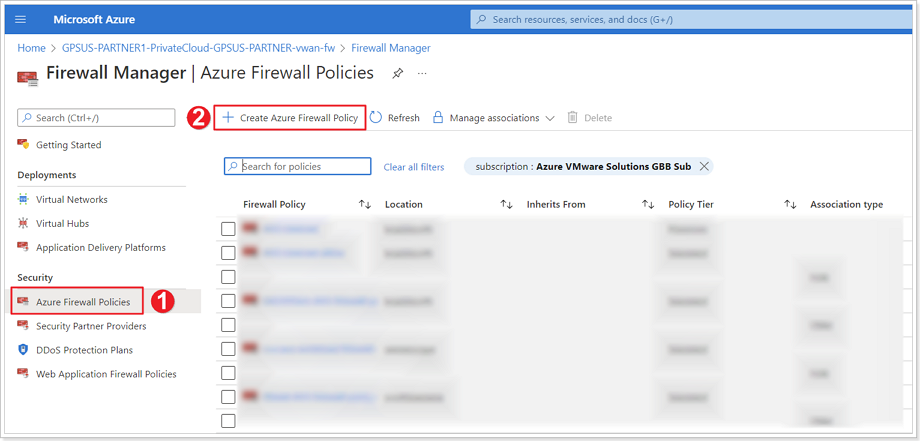
- Click Azure Firewall Policies.
- Click + Create Azure Firewall Policy.
Step 5: Firewall Policies Basics Tab
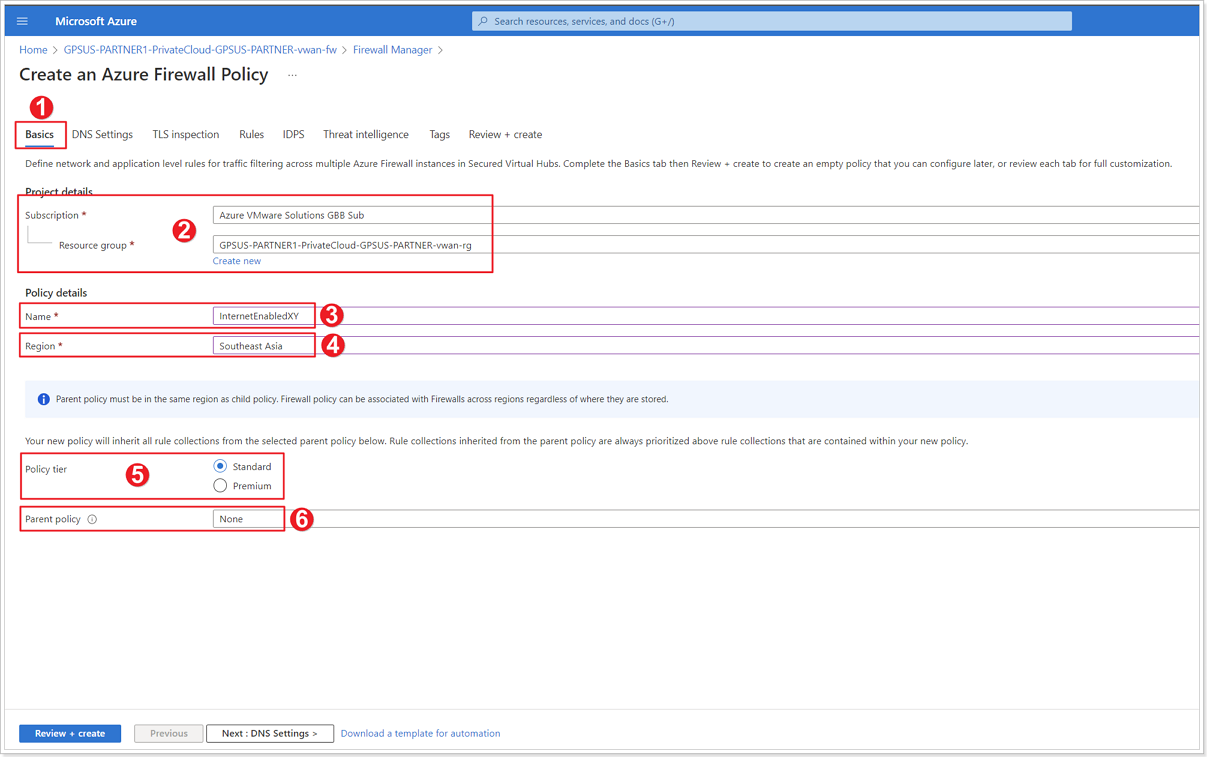
- Ensure you’re in the Basics tab.
- Leave the defaults for Subscription and Resource group.
- Give your policy a name: InternetEnabledXY, where X is your group number and Y is your participant number.
- Ensure to select your appropriate Region.
- For Policy tier select Standard.
- For Parent policy select None.
Step 6: Firewall Policies DNS Settings Tab
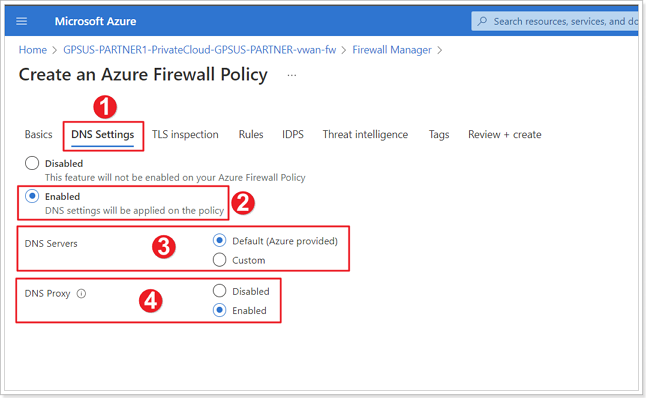
- Click DNS Settings tab.
- Select Enabled for DNS settings.
- For DNS Servers ensure Default (Azure provided) is selected.
- For DNS Proxy select Enabled.
Step 7: Firewall Policies Rules Tab
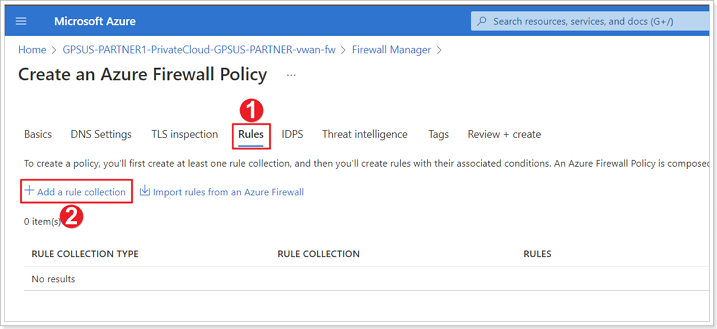
- Select Rules tab.
- Click + Add a rule collection.
Step 8: Add a Rule Collection
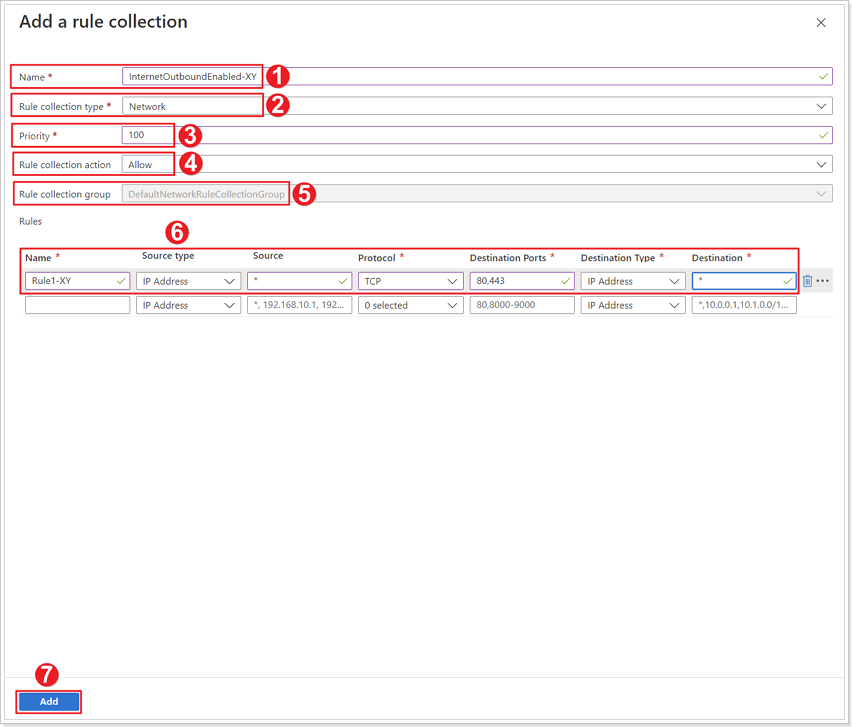
- Give the rule collection a name: InternetOuboundEnabled-XY, where X is your group number and Y is your participant number.
- For Rule collection type select Network.
- Give the rule collection a Priority - Should be a numeric valued between 100-65000.
- For Rule collection action select Allow.
- Leave the default for Rule collection group.
- Use the following values for your Rule.
| Name | Source type | Source | Protocol | Destination Ports | Destination Type | Destination |
|---|---|---|---|---|---|---|
| Rule1-XY | IP Address | * | TCP | 80,443 | IP Address | * |
Click Review + Create and then the Create button.
Feedback
Was this page helpful?
Glad to hear it! Please tell us how we can improve.
Sorry to hear that. Please tell us how we can improve.
Last modified December 17, 2024: update workflow (8881230)